Love this? Save it for later!
Share the inspiration with your friends
“I wasn’t planning on concocting a fancy dessert that day,” I confessed to myself as I stood in my tiny kitchen, cold brew in hand, pondering the leftover ladyfingers I’d forgotten about lurking in the pantry. It was one of those humid Saturday afternoons when the oven felt like an inferno and my craving for something sweet and refreshing just wouldn’t quit. The idea of a warm tiramisu was tempting, but honestly, who wants a steaming dessert in this heat?
Then the idea hit me—why not marry the bold, smooth flavor of cold brew coffee with a creamy tiramisu twist, all without turning on the oven? I grabbed my trusty mixing bowls, a tub of mascarpone, and started layering. Halfway through, the power flickered (of course!), and I almost dropped the whole thing—ladyfingers flying everywhere. Classic me, right? But somehow, that messy, slightly chaotic afternoon birthed what I now call the Creamy Cold Brew Tiramisu Icebox Cake.
Maybe you’ve been there too: craving something rich but chilled, with that perfect coffee kick that only cold brew can deliver. This recipe isn’t just a quick fix; it’s become my go-to for impressing friends on lazy weekends or when I need a dessert that comes together in a snap yet tastes like I spent hours fussing over it. Honestly, it’s that good. The first bite? Creamy, cool, with a gentle coffee buzz that lingers just right.
Let me tell you, this no-bake dessert stayed with me—not just because it’s delicious but because it’s a reminder that sometimes the best kitchen creations come from the most unexpected moments (and a little bit of mess). If you love tiramisu but want something easier and more refreshing for warmer days, this recipe’s got your name all over it.
Why You’ll Love This Creamy Cold Brew Tiramisu Icebox Cake Recipe
After testing this recipe on more than a dozen friends and family members (and sneaking bites at odd hours), I can confidently say it’s a crowd-pleaser with a twist. Here’s why it’s worth adding to your dessert rotation:
- Quick & Easy: Comes together in under 30 minutes, perfect for those last-minute dessert emergencies or casual weekend indulgences.
- Simple Ingredients: Nothing fancy or hard to find here. You probably have most of these staples right in your kitchen already.
- Perfect for Warm Weather: This chilled, no-bake treat is a refreshing change when you want something cool and satisfying.
- Crowd-Pleaser: Whether you’re serving it at brunch, potlucks, or casual dinners, it wins rave reviews from kids and adults alike.
- Unbelievably Delicious: The marriage of creamy mascarpone and smooth cold brew is downright addictive—soft, luscious layers that dissolve in your mouth.
What sets this apart from your typical tiramisu? It’s the cold brew coffee, which delivers a deeper, less bitter coffee flavor than espresso, and the icebox cake style—think layers of creamy goodness and coffee-soaked ladyfingers that meld together in the fridge overnight. No fuss, no baking, no complicated steps, just pure indulgence.
If you’ve ever been intimidated by classic tiramisu’s lengthy preparation or worried about raw eggs, this recipe is a dream come true. Plus, it’s versatile enough to tweak for your taste buds or dietary needs, which I’ll get into later.
What Ingredients You Will Need
This recipe uses simple, wholesome ingredients to deliver bold flavor and satisfyingly creamy texture without fuss. Most are pantry staples, and you can easily swap a few based on what you have on hand.
- Cold Brew Coffee: About 1 cup (240 ml), chilled. I prefer Stumptown or Califia Farms for their smooth, rich flavor.
- Ladyfingers: 24-30 pieces (about 7 ounces or 200 grams). These light, airy cookies soak up coffee beautifully—look for crisp, fresh ones.
- Mascarpone Cheese: 16 ounces (450 grams), room temperature. This gives the dessert its signature creamy, tangy richness.
- Heavy Cream: 1 cup (240 ml), cold. Whipped to soft peaks for that fluffy texture.
- Granulated Sugar: ½ cup (100 grams). Adjust to taste; I like it just sweet enough to balance the coffee’s bitterness.
- Vanilla Extract: 1 teaspoon, pure if possible. Adds warmth and depth.
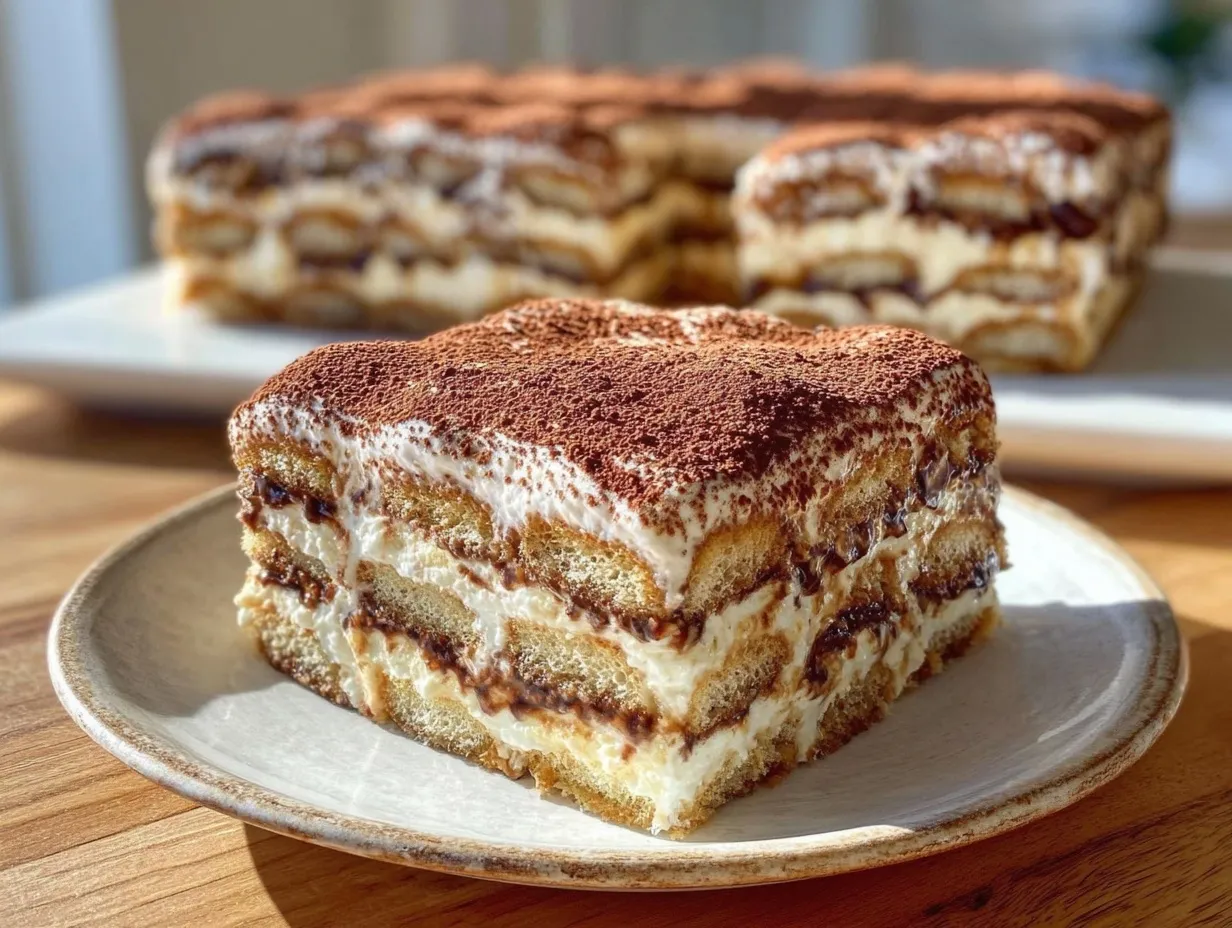
- Cocoa Powder: For dusting on top, unsweetened. A few tablespoons, sifted over the finished cake.
- Optional: Dark chocolate shavings or espresso powder sprinkled on top for extra flair.
Substitution tips: Use coconut cream instead of heavy cream for a dairy-free version, and almond flour ladyfingers or gluten-free cookies if needed. Greek yogurt can replace some mascarpone for a lighter twist, but keep in mind it changes the texture slightly.
Equipment Needed
- Mixing Bowls: One large for whipping cream and mascarpone, and a smaller one for mixing sugar and vanilla.
- Electric Mixer or Whisk: A hand mixer or stand mixer makes whipping the cream easier and faster. If you don’t have one, a sturdy whisk and some elbow grease will do.
- 9×9-inch (23×23 cm) Baking Dish or Springform Pan: For layering the icebox cake. Glass or ceramic dishes work great so you can see those beautiful layers.
- Sifter or Fine Mesh Strainer: To dust cocoa powder evenly on top for that classic tiramisu look.
- Spatula: For folding mascarpone and cream gently without deflating the mixture.
If you don’t have a springform pan, a shallow casserole dish works fine. Just cut the cake into squares instead of slices. Also, keep your utensils chilled in the fridge before whipping cream—it helps it whip up better and faster (trust me, I learned this the hard way!).
Preparation Method
- Prepare the coffee soak: Pour 1 cup (240 ml) of chilled cold brew coffee into a shallow bowl. Add 1 tablespoon sugar if you like it sweeter here, then stir until dissolved. Set aside. (5 minutes)
- Whip the cream: In a large bowl, whip 1 cup (240 ml) of cold heavy cream with an electric mixer until soft peaks form. It should look fluffy but still hold shape when you lift the beaters. (3-5 minutes)
- Mix mascarpone and sugar: In another bowl, gently fold together 16 ounces (450 grams) of room temperature mascarpone, ½ cup (100 grams) sugar, and 1 teaspoon vanilla extract until smooth and creamy. Avoid overmixing to keep it light. (3 minutes)
- Combine mascarpone and whipped cream: Carefully fold the whipped cream into the mascarpone mixture using a spatula. Fold gently until no streaks remain—don’t overmix or you’ll lose that airy texture. (2 minutes)
- Soak the ladyfingers: Quickly dip each ladyfinger into the cold brew soak—just a second per side. Don’t let them get soggy! Lay them flat in a single layer at the bottom of your 9×9-inch (23×23 cm) dish. (10 minutes)
- Layer the cream: Spread about one-third of the mascarpone cream mixture evenly over the soaked ladyfingers. Smooth the top gently with a spatula. (5 minutes)
- Repeat layering: Add a second layer of dipped ladyfingers, then more mascarpone cream. Repeat one more time, finishing with a thick layer of cream on top. (5-7 minutes)
- Chill and set: Cover the dish tightly with plastic wrap and refrigerate for at least 6 hours, preferably overnight. This allows the flavors to meld and the ladyfingers to soften perfectly. (6+ hours)
- Finish and serve: Just before serving, sift unsweetened cocoa powder generously over the top. Add chocolate shavings or a light sprinkle of espresso powder if you like. Cut into squares and enjoy! (5 minutes)
Quick tip: If your ladyfingers feel too dry or brittle, soak each side slightly longer—just watch closely so they don’t turn mushy. And if the mascarpone mixture feels too thick, a splash of milk or cream can loosen it up.
Cooking Tips & Techniques
Honestly, the secret to a perfect Creamy Cold Brew Tiramisu Icebox Cake lies in the balance between soaking the ladyfingers and keeping the mascarpone mixture light and airy. Here’s what I’ve learned after a few messy trials:
- Don’t over-soak: Ladyfingers that sit too long in coffee will turn gummy and collapse. A quick dip is all you need for that tender bite and coffee flavor.
- Room temperature mascarpone: It blends easier with whipped cream and avoids lumps. Take it out of the fridge at least 30 minutes before starting.
- Whip cream just right: Stop at soft peaks; overwhipping can cause the cream to break and become grainy.
- Folding technique: Use a spatula to fold mascarpone and cream gently in a circular motion, turning the bowl as you go. This keeps the mixture fluffy.
- Overnight chilling is best: The flavors really come together after several hours. But if you’re in a pinch, 4 hours can work okay.
- Use fresh cocoa powder: For dusting, sift it to avoid clumps and get that classic, elegant finish.
One time, I skipped the chilling step… let’s just say the texture was all wrong. Trust me, patience pays off here. Also, multitasking by prepping the coffee soak and whipping cream simultaneously can save you some time and keep the momentum going.
Variations & Adaptations
This recipe is super adaptable, which is part of the fun. Here are some ways to make it your own:
- Mocha Twist: Add 2 tablespoons of cocoa powder to the mascarpone mixture for a rich chocolate kick. Swap cold brew for mocha-flavored coffee if you have it.
- Berry Boost: Layer fresh raspberries or strawberries between the ladyfingers and mascarpone cream for a fruity contrast. Perfect for summer!
- Dairy-Free Version: Use coconut cream whipped to soft peaks and dairy-free cream cheese instead of mascarpone. Make sure your ladyfingers are vegan or substitute with gluten-free cookies.
- Spiced Version: Stir in a pinch of cinnamon and nutmeg to the mascarpone cream for warmth and complexity.
- Alcohol Option: For grown-up palates, splash some coffee liqueur or amaretto into the cold brew soak.
I personally love the berry version in summer since the tartness cuts through the creaminess so nicely. But the classic cold brew flavor keeps winning me over every time.
Serving & Storage Suggestions
Serve your Creamy Cold Brew Tiramisu Icebox Cake chilled, straight from the fridge. It’s best on a warm day when you want something cool but indulgent. Slice into neat squares and present on a simple white plate dusted with extra cocoa powder.
This dessert pairs beautifully with a scoop of vanilla bean ice cream or alongside a cup of freshly brewed coffee for the ultimate coffee lover’s treat. For a brunch spread, it complements fresh fruit and light pastries nicely.
Store leftovers covered in the refrigerator for up to 3 days. The flavors actually deepen as it sits, but the ladyfingers can get a bit softer, so enjoy sooner rather than later. To reheat, just let sit at room temperature for 10-15 minutes—not too long, or it loses its refreshing chill.
Nutritional Information & Benefits
One serving (about 1/9 of the cake) roughly provides:
| Calories | 320 |
|---|---|
| Fat | 22g (mostly from mascarpone and cream) |
| Carbohydrates | 26g |
| Protein | 5g |
| Sugar | 18g |
Thanks to mascarpone and heavy cream, this dessert is rich and satisfying, with calcium and vitamin A. The cold brew coffee adds antioxidants and a gentle caffeine kick without the acidity of espresso. If you need a gluten-free version, swapping ladyfingers is straightforward.
This isn’t a low-calorie treat, but it feels indulgent without being overwhelming—a balance I appreciate for weekend desserts.
Conclusion
If you’re searching for a no-fuss, no-bake dessert that tastes fancy but requires minimal effort, this Creamy Cold Brew Tiramisu Icebox Cake is your new best friend. It’s creamy, coffee-forward, and wonderfully refreshing, perfect for warmer days or anytime you want a comforting treat without heating up the kitchen.
Customize it however you like—add berries, spice it up, or keep it classic. I love this recipe because it’s forgiving, approachable, and always impresses, no matter who’s at the table. Plus, it reminds me that sometimes the best recipes come from happy accidents and a little kitchen chaos.
Give it a try, and don’t forget to share your adaptations or experiences in the comments below. I’m always excited to hear how you make this recipe your own. Happy layering, and cheers to sweet, creamy moments!
FAQs About Creamy Cold Brew Tiramisu Icebox Cake
Can I use regular brewed coffee instead of cold brew?
You can, but cold brew’s smooth, less acidic flavor really makes this dessert shine. If using hot coffee, let it cool completely and reduce the soaking time for ladyfingers to avoid sogginess.
How long can I store the icebox cake?
Store it covered in the fridge for up to 3 days. The texture is best within the first two days, but flavors deepen nicely with time.
Is it possible to make this dessert ahead of time?
Absolutely! In fact, chilling overnight is ideal to let the layers meld and soften. Just dust the cocoa powder right before serving to keep it fresh.
Can I freeze the tiramisu icebox cake?
Freezing isn’t recommended as the texture of mascarpone and ladyfingers may change, becoming grainy or mushy after thawing.
What can I substitute for ladyfingers?
Gluten-free cookies, vanilla wafers, or sponge cake slices can work as substitutes. Just soak them briefly in the cold brew to avoid sogginess.
For a similar luscious no-bake dessert, you might enjoy my Vanilla Cream Pudding Cake, which also layers creamy textures with delicate cake. And if you crave more coffee-inspired sweets, my Mocha Chocolate Mousse is a decadent choice.
Pin This Recipe!
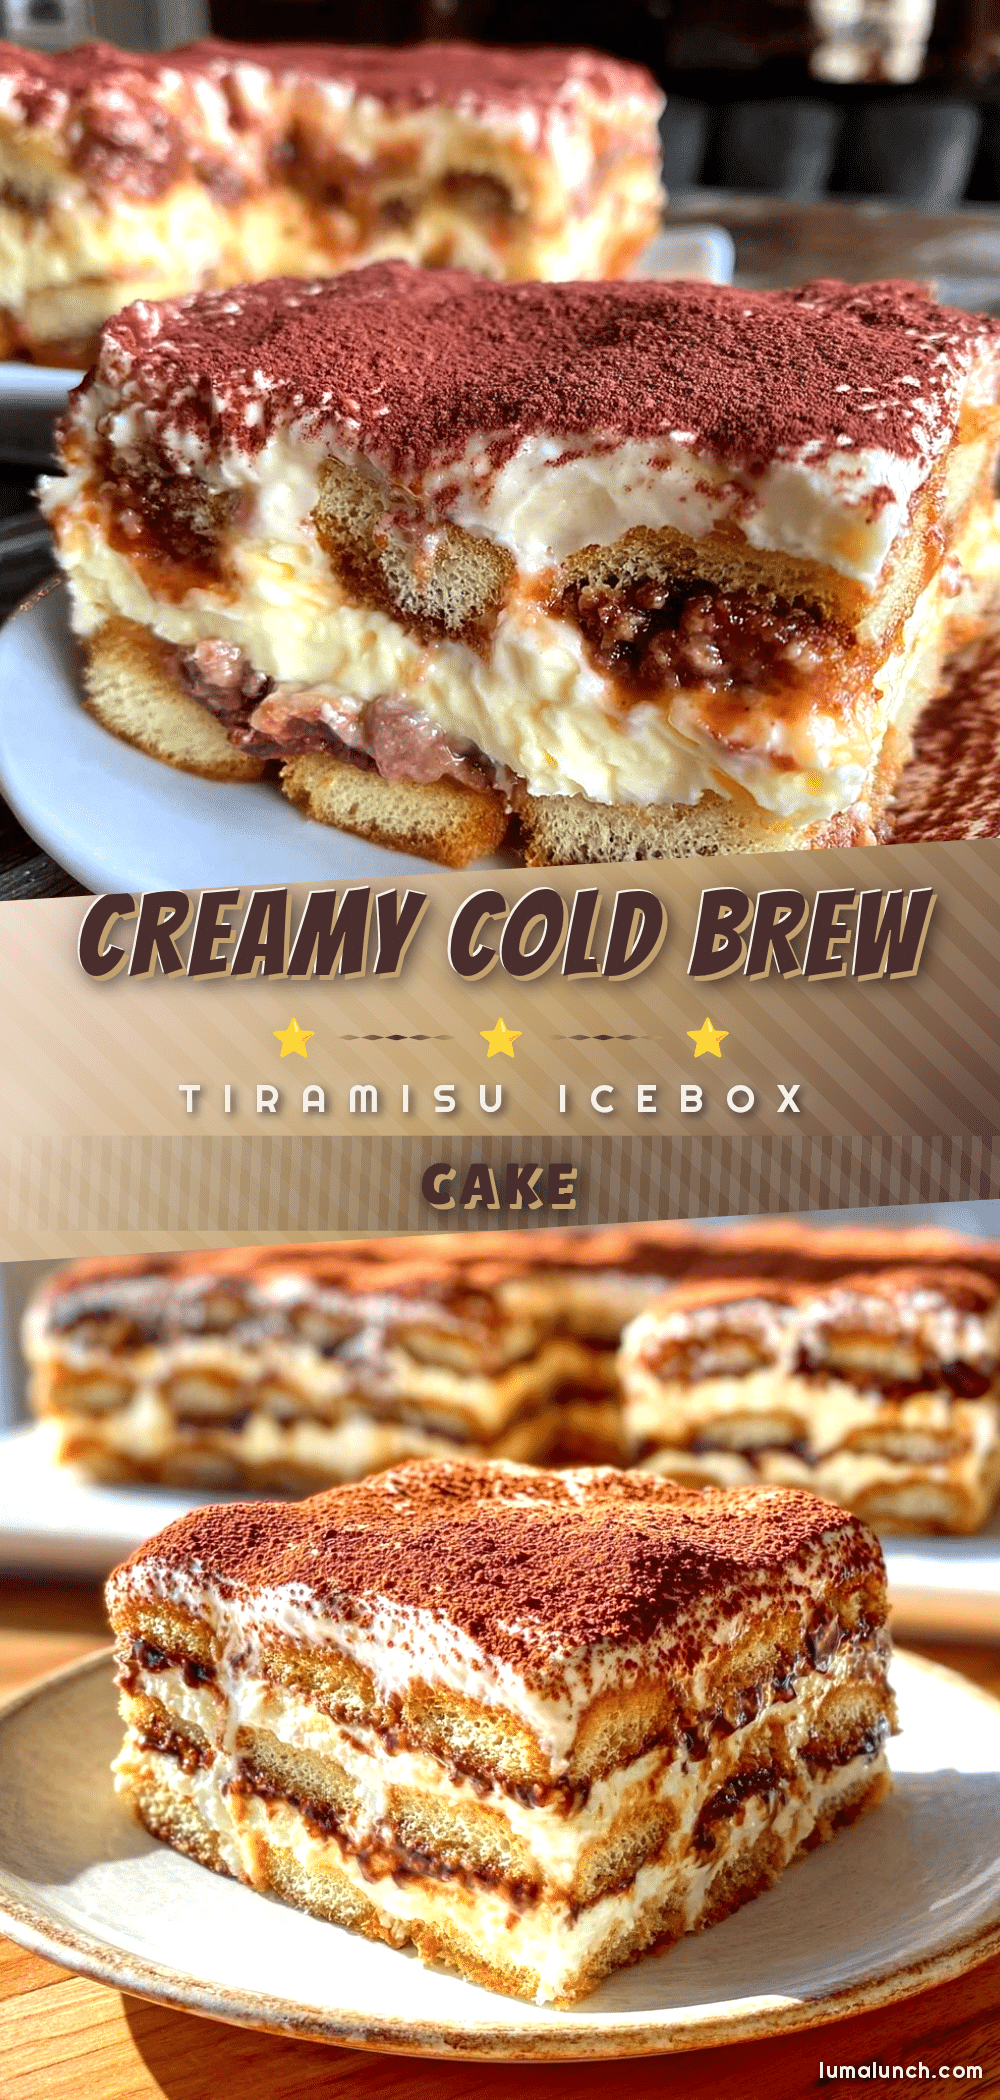
Creamy Cold Brew Tiramisu Icebox Cake

A no-bake, chilled dessert combining the smooth flavor of cold brew coffee with creamy mascarpone layers and coffee-soaked ladyfingers. Perfect for warm weather and quick indulgence.
- Prep Time: 20 minutes
- Cook Time: 0 minutes
- Total Time: 6 hours 20 minutes
- Yield: 9 servings 1x
- Category: Dessert
- Cuisine: Italian-inspired
Ingredients
- 1 cup (240 ml) cold brew coffee, chilled
- 24–30 ladyfingers (about 7 ounces or 200 grams)
- 16 ounces (450 grams) mascarpone cheese, room temperature
- 1 cup (240 ml) heavy cream, cold
- ½ cup (100 grams) granulated sugar
- 1 teaspoon vanilla extract
- Unsweetened cocoa powder, for dusting
- Optional: dark chocolate shavings or espresso powder for topping
Instructions
- Pour 1 cup (240 ml) of chilled cold brew coffee into a shallow bowl. Add 1 tablespoon sugar if desired and stir until dissolved. Set aside.
- In a large bowl, whip 1 cup (240 ml) of cold heavy cream with an electric mixer until soft peaks form.
- In another bowl, gently fold together 16 ounces (450 grams) of room temperature mascarpone, ½ cup (100 grams) sugar, and 1 teaspoon vanilla extract until smooth and creamy.
- Carefully fold the whipped cream into the mascarpone mixture using a spatula until no streaks remain.
- Quickly dip each ladyfinger into the cold brew soak for about one second per side. Lay them flat in a single layer at the bottom of a 9×9-inch (23×23 cm) dish.
- Spread about one-third of the mascarpone cream mixture evenly over the soaked ladyfingers.
- Repeat layering with dipped ladyfingers and mascarpone cream two more times, finishing with a thick layer of cream on top.
- Cover the dish tightly with plastic wrap and refrigerate for at least 6 hours, preferably overnight.
- Just before serving, sift unsweetened cocoa powder generously over the top. Add chocolate shavings or a light sprinkle of espresso powder if desired. Cut into squares and serve.
Notes
Do not over-soak ladyfingers to avoid sogginess; use room temperature mascarpone for easier mixing; whip cream to soft peaks only; fold mixtures gently to keep airy texture; chill overnight for best flavor melding; sift cocoa powder to avoid clumps; utensils chilled before whipping cream help achieve better volume.
Nutrition
- Serving Size: About 1/9 of the cak
- Calories: 320
- Sugar: 18
- Sodium: 70
- Fat: 22
- Saturated Fat: 15
- Carbohydrates: 26
- Fiber: 1
- Protein: 5
Keywords: cold brew, tiramisu, icebox cake, no-bake dessert, creamy, coffee dessert, easy dessert, summer dessert