Love this? Save it for later!
Share the inspiration with your friends
“I wasn’t planning on hosting a big party,” I remember saying to myself last spring. Then, out of nowhere, my cousin called, panicked about throwing a graduation celebration for her high school senior—and the guest list was nearly 25 people. The budget? Tight. The time? Tighter. Honestly, I didn’t know how we’d pull off something festive without breaking the bank or spending all day in the kitchen.
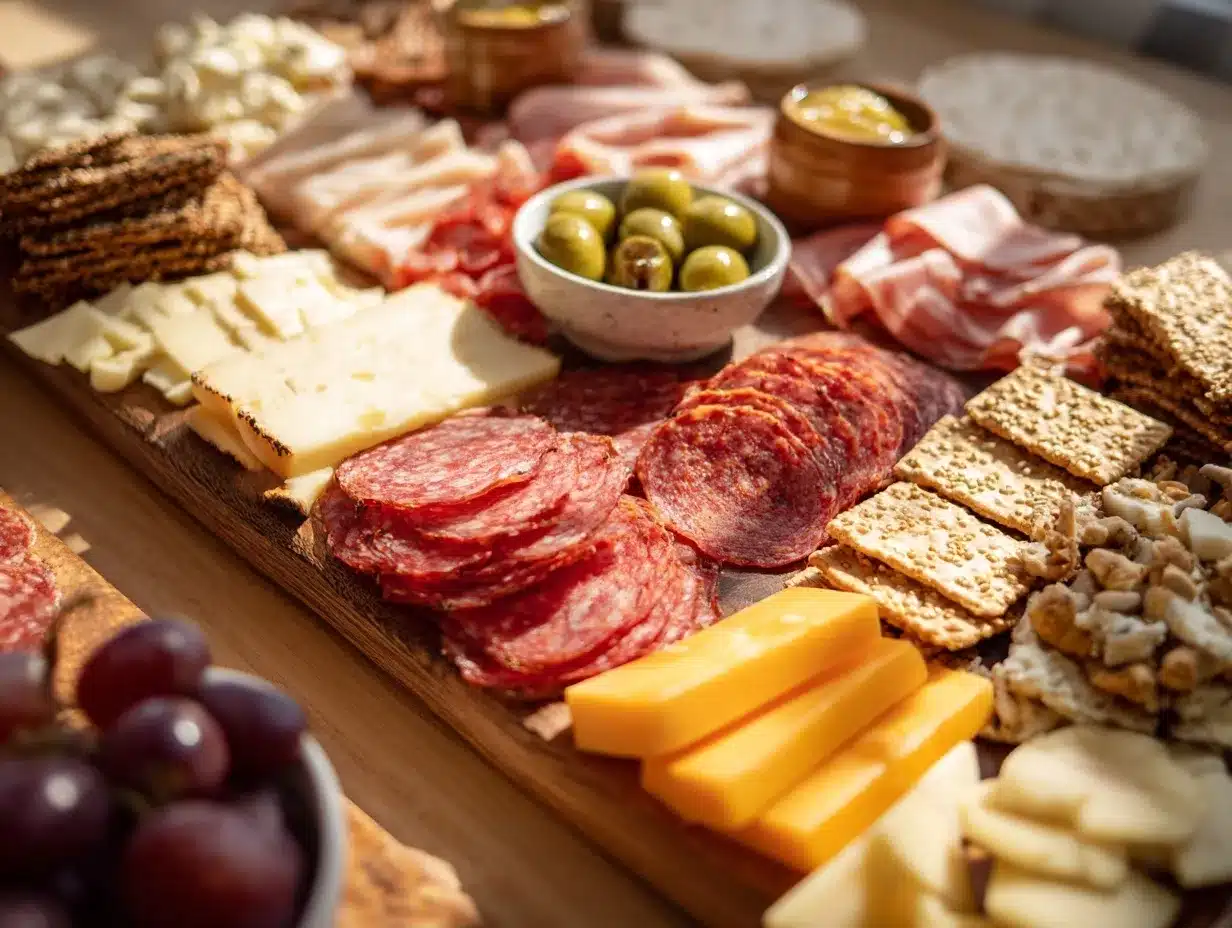
That’s when the idea of a budget-friendly graduation grazing board came to life. It wasn’t some fancy catering gig or an elaborate spread you’d see on TV. No, it was a mix of simple, affordable ingredients laid out to look inviting and make guests feel special. I remember we raided local markets, grabbed seasonal produce, and even made a few stops at discount stores (yes, the ones with slightly bruised but perfectly tasty fruits). The best part? Everyone loved it, and it was gone in no time—no waste, no fuss.
You know that feeling when a meal tastes better because it’s shared among friends and family? This grazing board captured that vibe perfectly. Sure, I missed grabbing a few ingredients here and there, and we got a little messy arranging everything on the platter, but it was worth every crumb. If you’re planning a graduation party and want something that’s easy on the wallet but big on impact, this recipe is for you. Let me tell you, it’s become my go-to for any casual celebration where good company and good food are the stars.
Why You’ll Love This Recipe
- Quick & Easy: Comes together in under 45 minutes, perfect for last-minute party prep or busy weekends.
- Simple Ingredients: No need for specialty stores—most items are pantry staples or easy to find at local markets.
- Perfect for Graduation Parties: Ideal for serving a crowd of 25 without the stress of plating individual meals.
- Crowd-Pleaser: Offers a variety of bites that satisfy picky eaters and adventurous foodies alike.
- Unbelievably Delicious: The combination of savory, sweet, crunchy, and creamy textures keeps everyone coming back for more.
This isn’t your typical grazing board. I’ve tested multiple layouts and ingredient combos to balance flavor, cost, and visual appeal. The secret? Thoughtful layering of textures and colors that make it irresistible. Plus, swapping a few pricey items for affordable alternatives keeps your wallet happy without sacrificing taste. Honestly, this board has saved me on more than one occasion when I needed to impress a crowd without turning my kitchen upside down.
It turns out that celebrating big moments doesn’t have to mean spending big bucks or stressing out. This recipe brings people together with ease and leaves you feeling like a party pro. You’ll want to keep this one tucked away for every graduation, birthday, or casual get-together.
What Ingredients You Will Need
This budget-friendly graduation grazing board uses simple, wholesome ingredients to deliver bold flavor and a satisfying variety of textures without any fuss. You’ll find most items are pantry staples, with a few fresh touches from the produce section. Feel free to tweak quantities based on what’s available or on sale near you!
- Cheeses:
- Sharp cheddar, sliced or cubed (adds savory depth)
- Colby Jack, cubed (melts nicely on the palate)
- Cream cheese spread or a simple herbed cheese ball (budget-friendly, creamy texture)
- Meats:
- Thinly sliced deli turkey or ham (affordable, crowd-pleaser)
- Salami or pepperoni rounds (adds a little spice)
- Crackers & Bread:
- Assorted crackers (look for store brands to save money)
- Baguette slices or sturdy breadsticks (great for layering)
- Fresh Produce:
- Seedless grapes (green or red, adds sweetness and color)
- Baby carrots (crunchy and colorful)
- Cucumber slices (refreshing and light)
- Cherry tomatoes (burst of juiciness)
- Dips & Extras:
- Hummus (store-bought or homemade)
- Mixed nuts (optional, for added crunch)
- Olives (green or black, pitted)
- Dried fruits like apricots or cranberries (adds chewiness and sweetness)
For cheese, I usually grab whatever’s on sale at my local grocery store or the market down the street. The key is variety—mild and sharp, soft and firm. If you want a vegetarian option, omit meats and add more hearty veggies or a bean dip. Feel free to swap store-brand crackers for your favorite kind, or use gluten-free crackers if needed. In summer, fresh berries can replace grapes for a seasonal twist. Trust me, a well-rounded board doesn’t have to break the bank.
Equipment Needed
- Large wooden or bamboo serving board (about 18×24 inches works well)
- Small bowls or ramekins for dips and nuts
- Sharp knives for slicing cheese and veggies
- Cutting board
- Tongs or small serving spoons
- Optional: cheese knives or spreaders
If you don’t have a large serving board, a clean, rimmed baking sheet lined with parchment paper can work in a pinch. I’ve also used sturdy trays or even a few smaller boards arranged together for a rustic look. When it comes to knives, a serrated edge is handy for bread, while a chef’s knife handles cheese and veggies smoothly. I usually keep a few small bowls to prevent dips from spreading all over the board—plus, it helps with easy refills. Don’t stress about fancy tools; practicality reigns here.
Preparation Method
- Prepare the Ingredients (15-20 minutes): Start by washing all your fresh produce thoroughly. Slice cucumbers into thin rounds, halve cherry tomatoes, and trim baby carrots if needed. Remove grapes from stems and pat dry. Slice cheeses into bite-size cubes or thin slices for easy grabbing. Cut baguette into 1/4-inch slices and toast lightly if you prefer a crunchier texture.
- Arrange the Base Elements (10 minutes): Lay your large serving board or tray on a flat surface. Place small bowls or ramekins for hummus, cream cheese spread, and olives spaced evenly across the board. This creates natural sections and helps contain wetter ingredients.
- Layer the Cheeses and Meats (10 minutes): Fold sliced deli meats into loose rolls or fans for easy grabbing. Arrange cheese cubes and slices in clusters near the dips. I like mixing cheddar and Colby Jack close together for color contrast. Scatter salami or pepperoni slices in small piles to add visual interest.
- Add Crackers and Bread (5 minutes): Fill in empty spaces with crackers and baguette slices. Place them in small stacks or fanned arrangements for accessibility. Make sure crackers don’t get too close to moist ingredients to avoid sogginess.
- Fill in with Fresh Produce and Extras (10 minutes): Tuck grapes, cherry tomatoes, cucumber slices, and baby carrots into remaining gaps. Add mixed nuts and dried fruits in small clusters for texture variety. The goal is a colorful, inviting spread that looks abundant.
- Final Touches and Serving (5 minutes): Give the board a quick once-over. Add any last-minute sprigs of herbs like rosemary or thyme if you have them for aroma and decoration. Grab small tongs or toothpicks for guests to use, and you’re ready to party!
Pro tip: If you’re short on time, prep ingredients the night before and assemble the board an hour before guests arrive. Keep fresh produce refrigerated until assembly to maintain crispness. I once forgot to toast the bread—don’t be like me—it makes a big difference in texture!
Cooking Tips & Techniques
Though this grazing board requires minimal cooking, a few tips help you nail the presentation and keep costs down. First, think about balance. Distribute colors evenly so your board looks lively from every angle. I always place contrasting colors side by side—like bright orange carrots next to creamy white cheese—to make the board pop.
Don’t overcrowd the board, either. It’s tempting to pile everything together, but giving each item space lets guests easily pick their favorites without a mess. If you have leftovers, store components separately to keep crackers crisp.
When selecting cheeses, buy blocks instead of pre-sliced for better value and freshness. Slice them yourself just before serving. The same goes for deli meats—ask your butcher for thin slices to save money and get a fresher product.
Lastly, keep dips simple. Homemade hummus or a quick herbed cream cheese spread can be whipped up in minutes and tastes way better than store-bought. But if time is tight, quality store-bought options work perfectly well.
One time, I underestimated how fast guests would dig in and ran out of crackers halfway through the party—lesson learned! A little extra of your most popular item goes a long way.
Variations & Adaptations
There’s plenty of room to customize this grazing board to suit different dietary needs, seasons, or flavor preferences. Here are a few ideas:
- Vegetarian-Friendly: Skip the deli meats and add marinated artichokes, roasted red peppers, or grilled zucchini ribbons. Extra nuts and seeds boost protein without breaking the bank.
- Seasonal Twist: Swap grapes for fresh summer berries or roasted root vegetables in cooler months. Adding figs or pomegranate seeds creates a festive look.
- Gluten-Free Option: Use gluten-free crackers or substitute bread with crisp veggies like celery sticks or endive leaves for scooping.
- Spice It Up: Add a spicy dip like a chipotle hummus or sprinkle chili flakes on cheeses for a subtle kick.
- Personal Favorite: I often include a homemade honey mustard dip that’s a hit with kids and adults alike—just mix Dijon mustard, honey, and a splash of apple cider vinegar.
Feel free to swap ingredients based on what’s on sale or what your crowd prefers. The key is variety and balance, not perfection.
Serving & Storage Suggestions
Serve the grazing board at room temperature to let the flavors really shine. Take it out of the fridge about 30 minutes before guests arrive so cheeses soften slightly and dips become more flavorful. Present it on a sturdy table near seating areas, so everyone can nibble easily.
This board pairs wonderfully with sparkling water, light white wines, or iced tea. For a heartier meal, add a big green salad or a pasta side dish.
If you have leftovers (which is rare!), wrap cheese tightly in plastic wrap and store in the fridge for up to 3 days. Keep crackers and bread separate in airtight containers to prevent sogginess. Reheat baguette slices briefly in a toaster oven to bring back their crunch.
Flavors often deepen after a day, especially dips and cheeses, so leftovers can taste even better the next day if stored properly.
Nutritional Information & Benefits
This grazing board offers a balanced mix of macronutrients from proteins, healthy fats, and carbohydrates. Cheeses and deli meats provide calcium and protein, while fresh veggies contribute fiber, vitamins, and antioxidants. Grapes and dried fruits add natural sweetness plus vitamin C and potassium.
For those mindful of dietary needs, this board can easily be adapted to low-carb, vegetarian, or gluten-free diets. Be mindful of sodium content in processed meats and opt for low-sodium versions if preferred.
From a wellness perspective, combining fresh produce with moderate portions of cheese and meat helps create a satisfying meal that keeps energy steady without feeling heavy—perfect for social gatherings where you want to stay energized and engaged.
Conclusion
Throwing a memorable graduation party for 25 people doesn’t have to drain your time or your wallet. This budget-friendly graduation grazing board proves that simple ingredients, a little creativity, and thoughtful prep can make a big impression. Whether you’re a seasoned host or a last-minute planner, this recipe adapts to your needs with ease.
I love this board because it brings people together effortlessly—everyone finds something they like, and the relaxed vibe encourages mingling and laughter. Plus, it’s a recipe I come back to whenever I want fuss-free, delicious food that looks special without the stress.
Give it a try and tweak it your way. Don’t forget to share your favorite combinations or tips—you know, those little secrets that make it uniquely yours. Happy celebrating!
Frequently Asked Questions
- How far in advance can I prepare the grazing board?
You can prep most ingredients a day ahead, but assemble the board 1-2 hours before serving for the freshest presentation. - Can I make this grazing board vegan?
Yes! Replace cheeses and meats with plant-based alternatives, add more veggies, nuts, and hummus for protein. - What’s the best way to keep crackers from getting soggy?
Keep crackers separate until serving and avoid placing them directly next to moist items like dips or fresh fruit. - How do I transport the grazing board if I’m taking it to a party?
Assemble it at the venue if possible. If not, transport ingredients separately and arrange onsite to avoid mess. - Can I include sweet treats on the grazing board?
Absolutely! Adding small cookies, chocolate bites, or fruit preserves can balance savory flavors and add fun variety.
For more easy party ideas, you might enjoy my crispy garlic chicken recipe or the fresh flavors in my summer fresh salad. Both dishes pair nicely with a relaxed grazing board like this one.
Pin This Recipe!
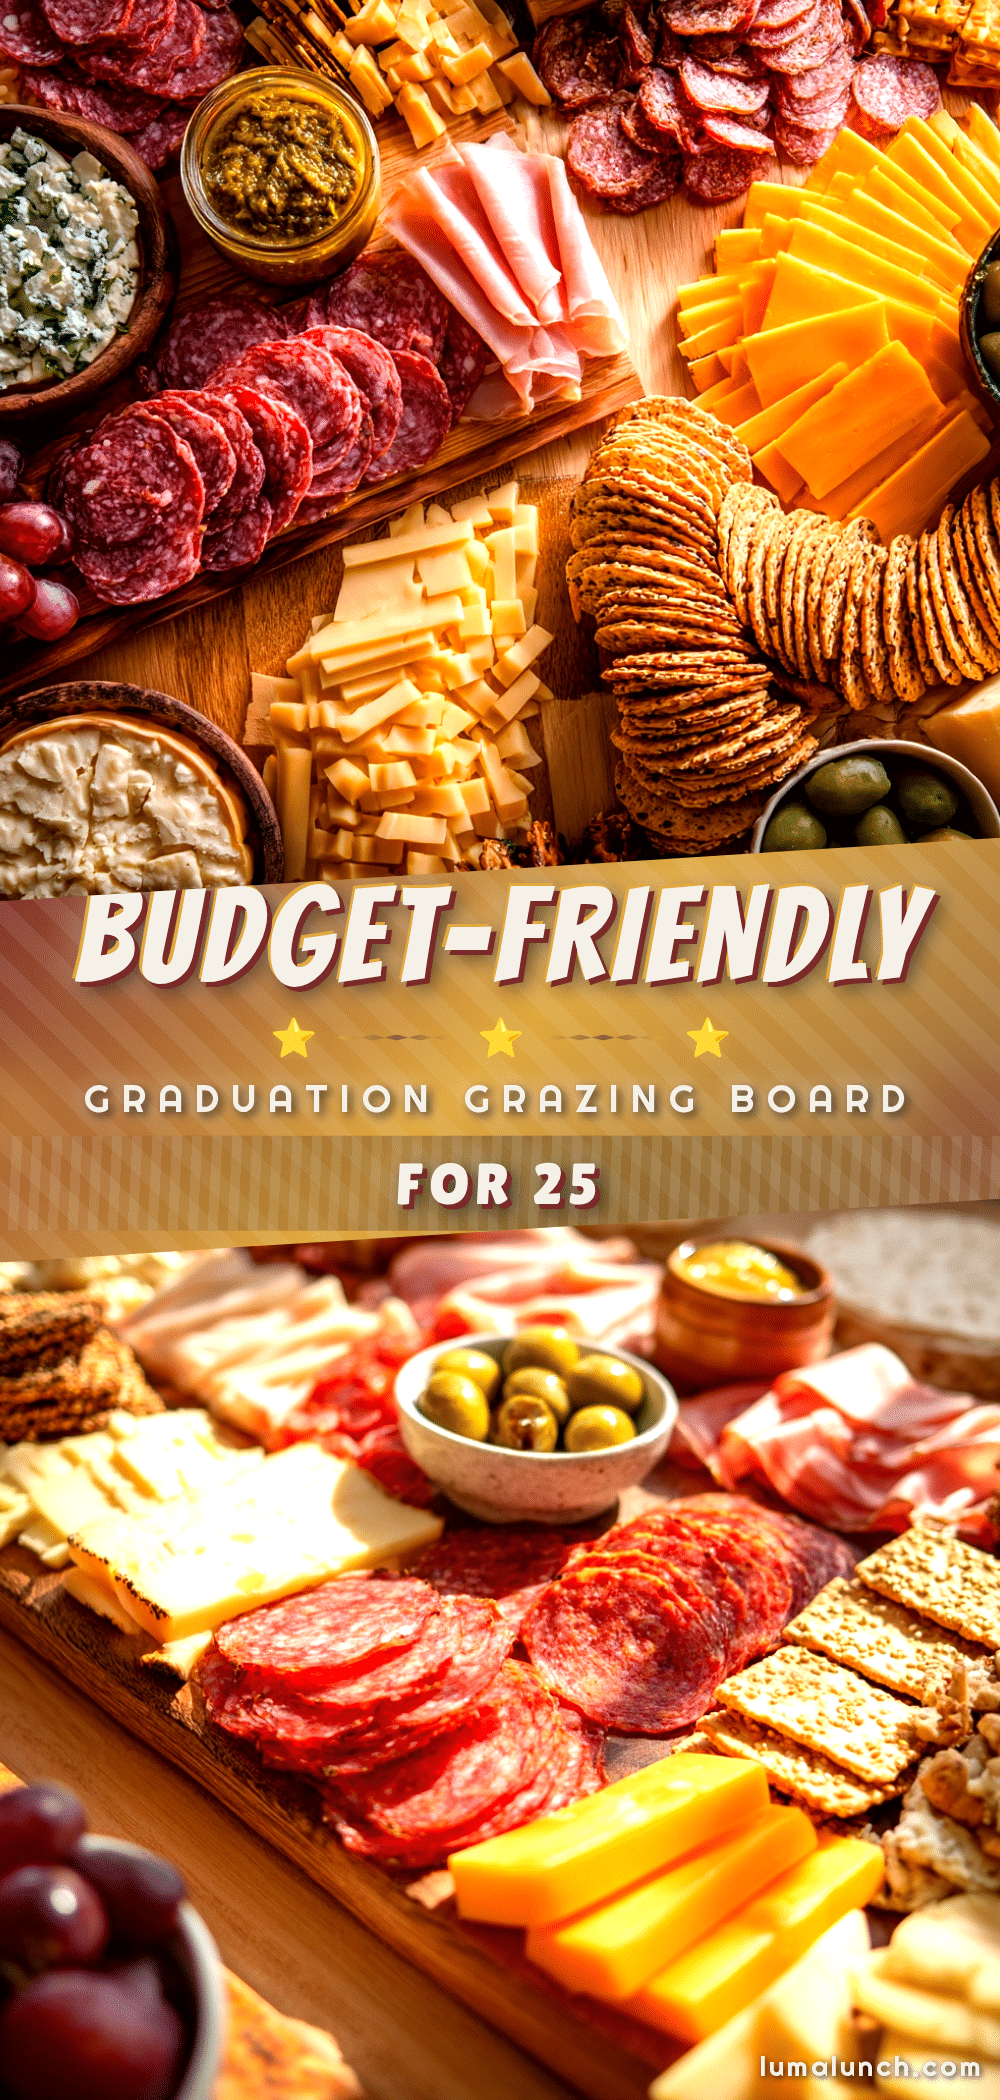
Budget-Friendly Graduation Grazing Board for 25 People

An easy, affordable grazing board recipe perfect for graduation parties and casual celebrations, featuring a variety of simple ingredients arranged for a crowd of 25.
- Prep Time: 15-20 minutes
- Cook Time: 0 minutes
- Total Time: 40-50 minutes
- Yield: 25 servings
- Category: Party Appetizer
- Cuisine: American
Ingredients
- Sharp cheddar cheese, sliced or cubed
- Colby Jack cheese, cubed
- Cream cheese spread or herbed cheese ball
- Thinly sliced deli turkey or ham
- Salami or pepperoni rounds
- Assorted crackers (store brands recommended)
- Baguette slices or sturdy breadsticks
- Seedless grapes (green or red)
- Baby carrots
- Cucumber slices
- Cherry tomatoes
- Hummus (store-bought or homemade)
- Mixed nuts (optional)
- Olives (green or black, pitted)
- Dried fruits like apricots or cranberries
Instructions
- Prepare the Ingredients (15-20 minutes): Wash all fresh produce thoroughly. Slice cucumbers into thin rounds, halve cherry tomatoes, and trim baby carrots if needed. Remove grapes from stems and pat dry. Slice cheeses into bite-size cubes or thin slices. Cut baguette into 1/4-inch slices and toast lightly if desired.
- Arrange the Base Elements (10 minutes): Lay your large serving board or tray on a flat surface. Place small bowls or ramekins for hummus, cream cheese spread, and olives spaced evenly across the board.
- Layer the Cheeses and Meats (10 minutes): Fold sliced deli meats into loose rolls or fans. Arrange cheese cubes and slices in clusters near the dips. Scatter salami or pepperoni slices in small piles.
- Add Crackers and Bread (5 minutes): Fill empty spaces with crackers and baguette slices, placing them in small stacks or fanned arrangements.
- Fill in with Fresh Produce and Extras (10 minutes): Tuck grapes, cherry tomatoes, cucumber slices, and baby carrots into remaining gaps. Add mixed nuts and dried fruits in small clusters.
- Final Touches and Serving (5 minutes): Add any last-minute sprigs of herbs like rosemary or thyme for decoration. Provide small tongs or toothpicks for guests to use.
Notes
Prep ingredients the night before and assemble the board 1-2 hours before serving for best freshness. Keep crackers separate until serving to avoid sogginess. Toast baguette slices for better texture. Customize with seasonal produce or dietary preferences.
Nutrition
- Serving Size: Approximately 1/25th
- Calories: 0.2503
- Sugar: 5
- Sodium: 450
- Fat: 18
- Saturated Fat: 7
- Carbohydrates: 15
- Fiber: 2
- Protein: 10
Keywords: grazing board, graduation party, budget-friendly, easy party recipe, appetizer, crowd-pleaser, simple ingredients