Love this? Save it for later!
Share the inspiration with your friends
Maggie wasn’t trying to impress anyone. I’d stopped by to drop off a casserole dish I’d borrowed, and the smell of chocolate and warm vanilla hit me before I even made it past her front door. It was the Tuesday before Thanksgiving, and I fully expected to find her elbow-deep in something complicated—maybe a brining solution or a test run of her grandmother’s stuffing.
Instead, she was standing at her kitchen island with a bowl of cake crumbs between her hands, rolling them into little balls like she was making meatballs for spaghetti dinner. Her two-year-old was on the floor, surrounded by sprinkles, and there was a half-empty bag of candy corn on the counter. “Oh, these?” she said when I asked what she was making. “Just something silly for the kids’ table.”
She said it like it was nothing. But let me tell you—those little turkey cake pops were the most adorable thing I’d seen all year. And honestly? They tasted way better than they had any right to. I mean, we’re talking about cake scraps mixed with frosting, dipped in chocolate, and decorated with candy. But there was something about the way she handled them—so casual, so unbothered—that made me realize this was the kind of recipe you keep in your back pocket. The kind that looks like you spent hours on it when really, you threw it together in fifteen minutes.
I stood there watching her for a good twenty minutes, asking questions, taking mental notes. She kept shrugging and saying, “It’s really not a big deal.” But that’s the thing, isn’t it? The best recipes always come from people who don’t think they’re doing anything special. Maybe you’ve been there—standing in someone else’s kitchen, watching them make magic with pantry staples, wondering why you’ve never thought to do it yourself.
These Cozy Thanksgiving Turkey Cake Pops became my secret weapon that year. I’ve made them every Thanksgiving since, and they never fail to get the exact same reaction I had in Maggie’s kitchen: pure, delighted surprise.
Why You’ll Love This Recipe
Let’s be honest—most Thanksgiving desserts are heavy. You’ve got your pies, your cobblers, your puddings. They’re delicious, but they leave you in a food coma before you’ve even cleared the main course. These turkey cake pops? They’re the perfect little bite of sweetness that doesn’t weigh you down.
- Quick & Easy: From start to finish, you’re looking at about 15 minutes of active work. The rest is just chilling time. Perfect for when you’re already juggling a turkey, three side dishes, and a table to set.
- Simple Ingredients: You probably have most of these in your pantry right now. A box of cake mix, a tub of frosting, some candy melts, and a few seasonal candies. No special trips to a fancy baking supply store.
- Perfect for Thanksgiving: These are made for the kids’ table, but honestly? The adults always sneak a few too. They’re a conversation starter, a photo op, and a dessert all in one.
- Crowd-Pleaser: I’ve brought these to Friendsgivings, potlucks, and family dinners. They get devoured every single time. Kids love the turkey design, and adults love how clever (and easy) they are.
- Unbelievably Delicious: The combination of moist cake, creamy frosting, and crunchy candy coating is just perfection. It’s comfort food in miniature form.
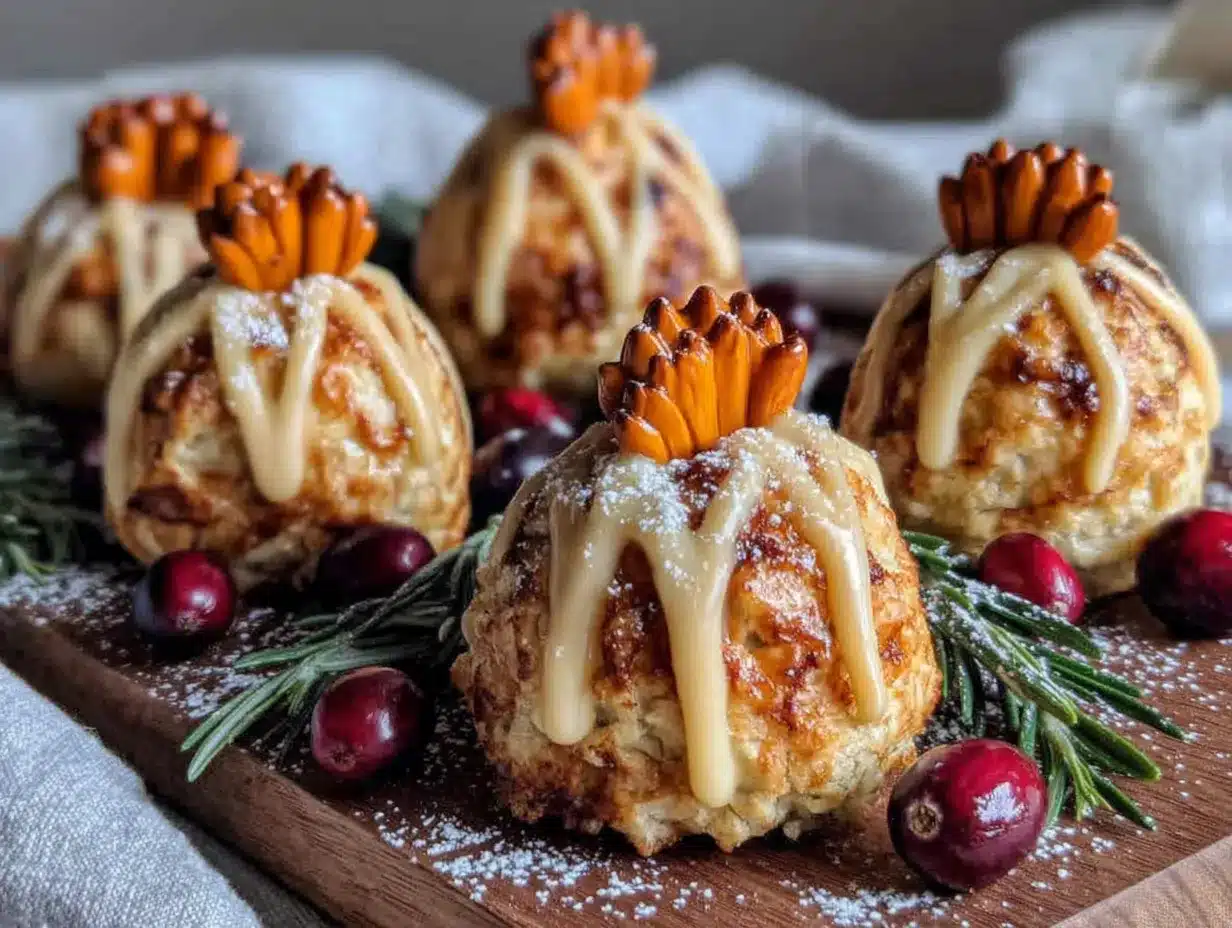
What makes this recipe different from every other cake pop tutorial out there? It’s the technique. Instead of baking a cake from scratch and crumbling it, we’re using a shortcut that saves you an hour without sacrificing taste. And the turkey design? It’s simpler than you think. No fondant, no fancy tools—just candy melts and a few strategically placed candies. This isn’t just another version of Thanksgiving desserts. It’s the version that looks impressive but feels completely doable, even if you’re not a baker.
There’s something about these little turkeys that just makes people happy. Maybe it’s the googly eyes. Maybe it’s the candy corn feathers. Or maybe it’s the fact that you made something adorable for the people you love, and it didn’t stress you out. That’s the kind of recipe worth keeping.
What Ingredients You Will Need
This recipe uses simple, store-bought ingredients to create something that looks way more complicated than it actually is. The beauty of these turkey cake pops is that you can customize almost everything based on what’s available at your local grocery store.
For the Cake Pops Base
- 1 box of yellow cake mix (or vanilla cake mix—I prefer Betty Crocker for consistent texture)
- Ingredients listed on the cake mix box (usually eggs, oil, and water—but we’re swapping water for milk for extra richness)
- 1/2 cup of milk (use whole milk for best flavor, but any milk works)
- 1/3 cup of cream cheese frosting (store-bought is fine, but homemade works beautifully too—use a creamy cream cheese frosting if you want extra tang)
For the Turkey Decoration
- 1 bag of candy melts (chocolate or vanilla—I use Wilton brand for smooth melting)
- 1 tablespoon of coconut oil or vegetable shortening (this thins the candy melts for easier dipping)
- Candy corn (for the turkey feathers—about 5-6 per pop)
- Mini chocolate chips (for the eyes—or use candy eyes if you prefer)
- Orange sprinkles or small orange candies (for the beak—I’ve used cut-up orange jelly beans in a pinch)
- Red M&M’s or red cinnamon candies (for the wattle—that little red thing under the beak)
Optional Add-Ins and Substitutions
- Gluten-free option: Use a gluten-free yellow cake mix and gluten-free frosting. The rest of the ingredients are naturally gluten-free.
- Dairy-free option: Use a dairy-free cake mix, plant-based milk, and dairy-free frosting. Most candy melts are dairy-free, but check the label.
- Flavor variations: Try chocolate cake mix with chocolate frosting for a richer pop. Or spice cake mix for a more autumnal flavor.
- Candy substitutions: No candy corn? Use small pretzel sticks broken in half. No orange sprinkles? A tiny dot of orange frosting works perfectly.
One thing I learned the hard way—don’t skip the coconut oil or shortening when melting your candy melts. The first time I made these, I melted the candy straight out of the bag, and it was so thick that the cake balls kept falling off the sticks. A little oil makes the coating smooth and thin, which means a cleaner dip and less frustration.
Equipment Needed
You don’t need a fancy cake pop machine for this recipe. I’ve made these in a regular oven with basic kitchen tools, and they turn out perfect every time.
- 9×13-inch baking pan (for baking the cake—any size works, but this is the most common)
- Large mixing bowl (for crumbling the cake and mixing with frosting)
- Cookie scoop or tablespoon (for portioning the cake mixture—a 1-inch scoop is ideal)
- Baking sheet lined with parchment paper (for chilling the cake balls)
- Lollipop sticks (available at craft stores or online—about 40-50 per batch)
- Microwave-safe bowl or double boiler (for melting the candy coating)
- Styrofoam block or cake pop stand (for drying the finished pops upright)
If you don’t have lollipop sticks, you can skip them entirely and make cake truffles instead. Just shape the mixture into balls, dip them in the candy coating, and set them on parchment to dry. They won’t look like turkeys on a stick, but they’ll taste exactly the same. I’ve done this when I was out of sticks, and honestly, no one complained.
For the Styrofoam block, I’ve used everything from a cardboard box with holes poked in it to a colander turned upside down. Get creative—as long as the pops can dry upright without touching anything, you’re golden.
Preparation Method
Let’s walk through this step by step. I’ll include all the little details that make the difference between okay cake pops and amazing cake pops.
Step 1: Bake the Cake
Preheat your oven to 350°F (175°C). Grease your 9×13-inch baking pan with butter or non-stick spray. Prepare the cake mix according to the box directions, but substitute the water with an equal amount of milk. This makes the cake denser and less crumbly, which is exactly what you want for cake pops. Bake according to the box instructions, usually 25-30 minutes, or until a toothpick inserted in the center comes out clean. Let the cake cool completely—this is crucial. Warm cake will make the frosting melt and turn your mixture into a sticky mess.
Step 2: Crumble the Cake
Once the cake is completely cool, break it into large chunks and place them in your large mixing bowl. Use your hands to crumble the cake into fine crumbs. You want it to look like wet sand—no large chunks remaining. This takes about 3-4 minutes of thorough crumbling. I put on some music and zone out during this part. It’s oddly satisfying.
Step 3: Mix with Frosting
Add 1/3 cup of cream cheese frosting to the cake crumbs. Use a spatula or your hands (clean hands work best) to mix everything together until it forms a dough-like consistency. The mixture should hold together when you squeeze it in your fist. If it’s too dry, add another tablespoon of frosting. If it’s too wet, add a little more cake crumb. You’re looking for a Play-Doh texture—moldable but not sticky.
Step 4: Shape the Cake Balls
Using your cookie scoop or a tablespoon, portion out the cake mixture and roll it into balls about 1 inch in diameter. Place them on your parchment-lined baking sheet. You should get about 40-45 balls from one batch. Don’t worry if they’re not perfectly round—the candy coating will smooth them out later. Pop the baking sheet in the refrigerator for at least 30 minutes. Chilling is non-negotiable. Warm cake balls will fall off the sticks when you dip them.
Step 5: Prepare the Candy Coating
While the cake balls are chilling, melt your candy melts. Place them in a microwave-safe bowl with 1 tablespoon of coconut oil. Microwave in 30-second intervals, stirring between each, until completely smooth. Don’t overheat—candy melts can seize up and become unusable if they get too hot. The mixture should be thin enough to coat the back of a spoon easily.
Step 6: Dip the Sticks
Take your chilled cake balls out of the refrigerator. Dip the tip of a lollipop stick into the melted candy coating, then insert it about halfway into a cake ball. This “glue” step keeps the ball firmly attached to the stick. Return the sticked cake balls to the refrigerator for another 10-15 minutes to set the glue.
Step 7: Dip the Cake Pops
Now for the main event. Hold a cake pop by the stick and dip it completely into the melted candy coating. Gently tap the stick against the side of the bowl to let excess coating drip off. Don’t shake it—just tap. Insert the stick into your Styrofoam block or stand. Repeat with all the pops. Work quickly—the coating sets fast.
Step 8: Decorate the Turkeys
This is where the magic happens. While the coating is still wet, add the candy corn feathers in a fan pattern at the back of the pop. Place two mini chocolate chips for eyes. Add an orange sprinkle or candy for the beak. Stick a red M&M underneath the beak for the wattle. Work quickly before the coating sets. If the coating hardens before you finish decorating, a tiny dot of melted candy works as glue.
Step 9: Let Them Set
Allow the decorated cake pops to set completely, about 15-20 minutes at room temperature. The coating should be firm and shiny. Once set, they’re ready to serve or store.
Cooking Tips & Techniques
I’ve made these turkey cake pops more times than I can count, and I’ve made every mistake in the book. Here’s what I’ve learned so you don’t have to repeat my errors.
The biggest mistake people make is skipping the chill time. I know it’s tempting to rush, especially when you’re short on time before Thanksgiving dinner. But warm cake balls are a disaster waiting to happen. They’ll slide right off the stick, crack the coating, and leave you with a bowl of chocolate soup with cake chunks floating in it. Trust me, I’ve been there. Give them the full chill time, and you’ll thank yourself later.
Another common issue is candy coating that’s too thick. If your coating is gloppy and uneven, add a little more coconut oil. The consistency should be like warm honey—thin enough to drip off smoothly but thick enough to coat completely. I learned this the hard way when my first batch looked like they’d been dipped in modeling clay.
For the candy corn feathers, placement matters. Arrange them in a fan shape with the white tips pointing outward. This gives the turkey a full, feathered look. If you just stick them on randomly, it looks more like a porcupine than a turkey. Not that there’s anything wrong with porcupine cake pops—they just don’t say “Thanksgiving.”
Timing is everything with these. I like to bake the cake and shape the balls the night before. Then, on Thanksgiving morning, I just dip and decorate. It takes about 20 minutes total, and I’m not stressed out trying to do everything at once. Multitasking is overrated when you’re making dessert for a crowd.
If you’re making these with kids, embrace the imperfection. My niece once made a turkey with three eyes and no beak, and it was the most popular pop at the table. The charm is in the handmade look—don’t stress about making them perfect. They’ll taste amazing no matter what.
Variations & Adaptations
One of the best things about this recipe is how easy it is to adapt. Here are some variations I’ve tried and loved.
Chocolate Turkey Cake Pops
Use a chocolate cake mix and chocolate frosting for the base. Dip in milk chocolate candy melts. The chocolate-on-chocolate combination is rich and indulgent—perfect for the serious chocoholics at your table. I made these one year when I ran out of yellow cake mix, and they were a huge hit.
Pumpkin Spice Turkey Cake Pops
For an extra-autumnal twist, use a spice cake mix and add 1/2 cup of pumpkin puree to the batter (reduce the oil by 2 tablespoons to compensate). The pumpkin and spice flavors pair beautifully with the cream cheese frosting. These taste like fall in a bite-sized package.
Vegan Turkey Cake Pops
Use a vegan cake mix, plant-based milk, and vegan frosting. Most candy melts are accidentally vegan, but double-check the label. I’ve made these for my vegan cousin, and she said they were better than the “real” ones. The key is using a good-quality vegan frosting that’s creamy and not too sweet.
Mini Turkey Truffles (No Sticks)
If you’re short on time or don’t have lollipop sticks, skip them entirely. Shape the cake mixture into small balls, dip them in the candy coating, and place them on parchment paper. Decorate them the same way—candy corn feathers, chocolate chip eyes, orange beak, red wattle. They look like little turkeys resting on a plate, and they’re even easier to eat.
Gluten-Free Turkey Cake Pops
Use a gluten-free yellow cake mix and gluten-free frosting. The rest of the ingredients are naturally gluten-free. I’ve found that gluten-free cake mixes can be a little drier, so you might need an extra tablespoon of frosting to get the right consistency. Taste test as you go—you want the mixture to hold together without being sticky.
Serving & Storage Suggestions
These turkey cake pops are best served at room temperature. The coating stays firm and shiny, and the cake center is soft and moist. Arrange them on a platter with the turkey faces facing outward for maximum cuteness. I like to place them around a bowl of dip (extra melted candy coating or a caramel sauce) for a fun presentation.
They pair beautifully with a hot cup of coffee or a glass of cold milk. For a Thanksgiving dessert spread, arrange them alongside your pies and cobblers. They add a pop of color and whimsy that balances out the more traditional desserts.
Storage: Store leftover cake pops in an airtight container at room temperature for up to 3 days. Do not refrigerate them—the moisture in the fridge can make the coating sweat and become sticky. If you need to store them longer, you can freeze them for up to 2 months. Place them in a single layer in a freezer-safe container, with parchment paper between layers. Thaw at room temperature for about 30 minutes before serving.
Reheating: These are meant to be served at room temperature, so no reheating is needed. If they’ve been in the fridge (which I don’t recommend), let them sit out for 20 minutes before serving.
One thing I love about these cake pops is that the flavors actually get better after a day. The cake and frosting meld together overnight, creating a more cohesive texture. So if you’re making them ahead of time, they’ll taste even better on Thanksgiving Day.
Nutritional Information & Benefits
Let’s be real—these are a treat, not a health food. But here’s the nutritional breakdown for one turkey cake pop (based on a batch of 40 pops).
| Nutrient | Amount per Pop |
|---|---|
| Calories | 120 |
| Total Fat | 5g |
| Saturated Fat | 3g |
| Carbohydrates | 18g |
| Sugar | 12g |
| Protein | 1g |
These little pops are portion-controlled, which is actually a benefit when you’re surrounded by Thanksgiving food. Instead of cutting yourself a massive slice of pie, you can grab one or two of these and feel satisfied without overdoing it.
The cake provides quick energy from carbohydrates, and the cream cheese frosting adds a small amount of protein and calcium. If you use dark chocolate candy melts, you’ll get a dose of antioxidants too. But honestly? The biggest benefit is the joy they bring. There’s something about a tiny, adorable turkey that just makes people smile. And that’s worth every calorie.
Dietary considerations: This recipe contains gluten, dairy, and eggs. For gluten-free or dairy-free options, see the variations section above. The candy melts may contain soy, so check labels if you have a soy allergy.
Conclusion
These Cozy Thanksgiving Turkey Cake Pops have become a non-negotiable part of my holiday tradition. They’re the dessert that nobody expects, but everyone remembers. The first year I brought them to my family’s Thanksgiving, my aunt (who’s been making the same pumpkin pie for 30 years) said, “These are the cutest things I’ve ever seen.” Coming from her, that’s high praise.
What I love most about this recipe is how it captures the spirit of Thanksgiving without the stress. It’s playful, it’s forgiving, and it’s made to be shared. Whether you’re making them with your kids, your friends, or just for yourself, these little turkeys bring a sense of joy that’s hard to find in more complicated desserts.
So go ahead—give them a try. Customize them with your favorite flavors. Make them as goofy or as polished as you want. And when someone asks where you got the recipe, just shrug and say, “Oh, it’s nothing.” Because that’s the best kind of recipe, isn’t it? The kind that looks like a big deal but feels like no big deal at all.
I’d love to see your turkey cake pops! Share your creations in the comments below, or tag me in your photos. And if you come up with your own variation, let me know—I’m always looking for new ideas. Happy Thanksgiving, friends. Here’s to good food, good company, and desserts that make us smile.
Frequently Asked Questions
Can I use a homemade cake instead of a box mix?
Absolutely! Use your favorite yellow cake recipe or vanilla cake recipe. Just make sure the cake is completely cool before crumbling. Homemade cakes tend to be more moist, so you might need slightly less frosting to achieve the right consistency.
Why did my cake pops crack?
Cracking happens when the cake balls are too cold when you dip them, or when the candy coating is too hot. The temperature shock causes the coating to crack. Let your chilled cake balls sit at room temperature for 5 minutes before dipping, and make sure your melted coating isn’t too hot (it should be warm, not hot).
Can I make these ahead of time?
Yes! You can make the cake balls up to 2 days in advance and store them in the refrigerator. Dip and decorate them on the day you plan to serve them. Fully assembled cake pops can be stored at room temperature for up to 3 days in an airtight container.
My candy melts are too thick. What do I do?
Add more coconut oil or vegetable shortening, one teaspoon at a time, until the coating reaches a smooth, pourable consistency. Don’t add water—it will cause the candy to seize up. If you don’t have coconut oil, a little bit of vegetable oil works in a pinch.
Can I freeze the cake pops?
Yes, but with caution. Freeze them in a single layer in an airtight container with parchment paper between layers. Thaw at room temperature for 30 minutes before serving. Note that the coating may develop a slight condensation when thawing, but they’ll still taste delicious.
Pin This Recipe!
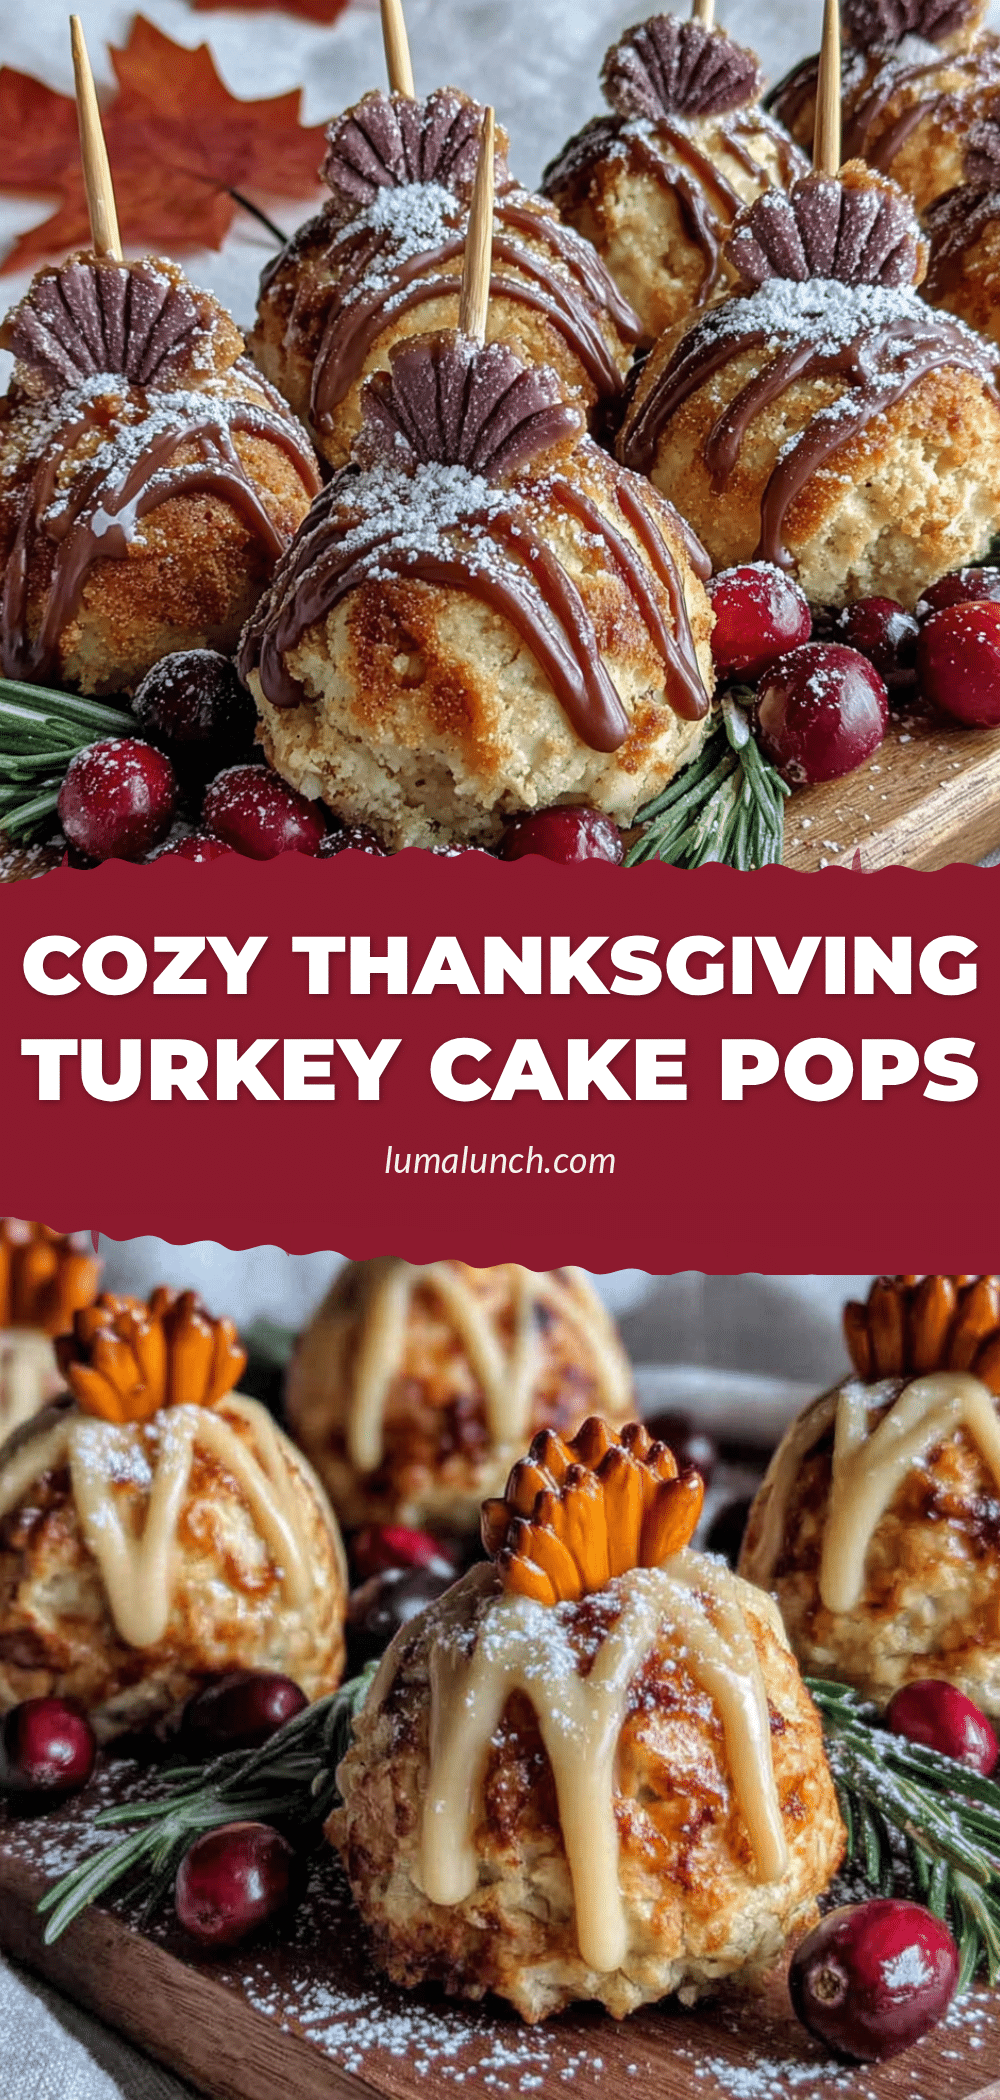
Cozy Thanksgiving Turkey Cake Pops
These adorable turkey cake pops are the perfect little bite of sweetness that doesn’t weigh you down. Made with simple ingredients and ready in just 15 minutes of active work, they’re a crowd-pleasing Thanksgiving dessert that looks impressive but feels completely doable.
- Prep Time: 15 minutes
- Cook Time: 30 minutes
- Total Time: 45 minutes
- Yield: 40-45 servings 1x
- Category: Dessert
- Cuisine: American
Ingredients
- 1 box yellow cake mix (or vanilla cake mix)
- Ingredients listed on cake mix box (eggs, oil, and milk instead of water)
- 1/2 cup milk (whole milk preferred)
- 1/3 cup cream cheese frosting (store-bought or homemade)
- 1 bag candy melts (chocolate or vanilla)
- 1 tablespoon coconut oil or vegetable shortening
- Candy corn (5-6 per pop for feathers)
- Mini chocolate chips (for eyes)
- Orange sprinkles or small orange candies (for beak)
- Red M&M’s or red cinnamon candies (for wattle)
Instructions
- Preheat oven to 350°F (175°C). Grease a 9×13-inch baking pan.
- Prepare cake mix according to box directions, substituting water with an equal amount of milk. Bake 25-30 minutes or until a toothpick inserted in center comes out clean. Let cool completely.
- Crumble the cooled cake into fine crumbs in a large mixing bowl.
- Mix in 1/3 cup cream cheese frosting until a dough-like consistency forms (like Play-Doh).
- Roll mixture into 1-inch balls and place on a parchment-lined baking sheet. Refrigerate for at least 30 minutes.
- Melt candy melts with 1 tablespoon coconut oil in a microwave-safe bowl in 30-second intervals, stirring until smooth.
- Dip the tip of a lollipop stick into melted coating, then insert halfway into a chilled cake ball. Return to refrigerator for 10-15 minutes.
- Dip each cake pop completely into melted coating, tapping gently to remove excess. Insert into a Styrofoam block or stand.
- While coating is still wet, decorate: add candy corn feathers in a fan pattern at the back, mini chocolate chips for eyes, an orange sprinkle for beak, and a red M&M for wattle.
- Let set completely at room temperature for 15-20 minutes until coating is firm and shiny.
Notes
Don’t skip the chill time—warm cake balls will fall off sticks. Add coconut oil to candy melts for smooth coating. For best results, bake cake and shape balls the night before, then dip and decorate on serving day. Store in airtight container at room temperature for up to 3 days.
Nutrition
- Serving Size: 1 cake pop
- Calories: 120
- Sugar: 12
- Sodium: 95
- Fat: 5
- Saturated Fat: 3
- Carbohydrates: 18
- Protein: 1
Keywords: Thanksgiving, turkey cake pops, easy dessert, holiday treats, cake pops, kids dessert, fall baking


