Love this? Save it for later!
Share the inspiration with your friends
The church potluck was in six hours and I’d completely forgotten. My aunt Betty—who never forgets anything—had texted the whole family group chat at 6 AM with a cheerful “See everyone at 6!” and I’d rolled over and gone back to sleep. By the time I checked my phone at noon, the panic hit like a freight train. Everyone else would be bringing their signature dishes: my cousin’s famous twice-baked potatoes, Uncle Joe’s barbecue ribs that he spends two days on, and Betty herself with her legendary chocolate silk pie. And me? I had a can of pumpkin puree in the pantry, a half-empty container of heavy cream, and exactly three hours before I needed to walk out the door.
I stood in my kitchen, hands on my hips, staring at that can of pumpkin like it was a life raft. Maybe you’ve been there—that moment where you realize you’ve got to bring something to a gathering and you’ve absolutely got nothing prepared. The store-bought pies at the grocery store were already picked over by noon, and honestly, I didn’t have the budget for a fancy bakery pie anyway. I mean, feeding a family on a sensible budget means you learn to make do with what you’ve got. And what I had was a simple, honest pumpkin pie recipe my grandmother used to make for Thanksgiving—the kind that uses basic ingredients and feeds a crowd without breaking the bank.
So I threw myself into it. I’ll admit, I was a little frantic at first. I forgot to pre-bake the crust and had to scramble, I spilled flour all over the counter, and I may have burned my finger on the oven rack. But somehow, that pie came together. It came out of the oven golden and fragrant, with that perfect custard wobble that says “I’m done.” I wrapped it up, grabbed a can of whipped cream from the fridge, and walked into that potluck feeling like I was bringing a secret weapon. Long story short? That simple, last-minute pumpkin pie disappeared faster than anything else on the dessert table. Betty asked for the recipe. Uncle Joe had two slices. And I just smiled and said, “It’s nothing fancy—just a good, honest pie.”
Why You’ll Love This Recipe
Look, I’ve made a lot of pumpkin pies over the years. Some were disasters (we don’t talk about the cracked-top incident of 2019), and some were pretty good. But this one? This is the one I come back to every single time. Here’s why it works for real families on real budgets:
- Feeds a Crowd on a Budget: This recipe makes one deep-dish pie or two standard pies, easily serving 12-16 people. The ingredients cost a fraction of what you’d pay for a bakery pie, and honestly, it tastes better anyway.
- Pantry-Friendly Ingredients: You probably already have most of these things in your kitchen. Canned pumpkin, eggs, sugar, flour, butter, and basic spices—no expensive specialty items required.
- Perfect for Family Gatherings: Whether it’s Thanksgiving, a potluck, or just a Sunday dinner with the in-laws, this pie is a crowd-pleaser. Kids love it, adults love it, and even the picky eaters in my house ask for seconds.
- Make-Ahead Friendly: You can make this pie a day or two ahead of time, which is a lifesaver when you’re juggling a million other dishes. The flavors actually get better after a day in the fridge.
- Foolproof for Beginner Bakers: I’m not a pastry chef, and I promise you don’t need to be one either. This recipe is forgiving, straightforward, and includes all the little tips I’ve learned from my own mistakes.
What makes this recipe different from all the other pumpkin pie recipes out there? It’s the texture. I use a combination of heavy cream and whole milk instead of evaporated milk, which gives the filling an incredibly silky, smooth custard that just melts in your mouth. Plus, I’ve perfected the spice blend—not too heavy on the cloves, just enough ginger to warm things up, and a generous hand with the cinnamon. It’s the kind of pie that makes you close your eyes after the first bite, even if you’re standing in a crowded church basement balancing a paper plate on your knee.
What Ingredients You Will Need
This recipe uses simple, wholesome ingredients to deliver that classic pumpkin pie flavor and silky texture without any fuss. Most of these are pantry staples you likely already have, which is exactly what you want when you’re feeding a family on a budget.
For the Pie Crust
- 2 ½ cups all-purpose flour (315g) — I use Gold Medal or King Arthur for consistent results. No need for fancy pastry flour here.
- 1 teaspoon salt (5g) — Just regular table salt is fine.
- 1 tablespoon granulated sugar (12g) — A tiny bit of sweetness helps the crust brown beautifully.
- 1 cup cold unsalted butter (226g, 2 sticks) — Cut into small cubes and keep it cold. This is the secret to a flaky crust. If you only have salted butter, just reduce the added salt to ½ teaspoon.
- 6-8 tablespoons ice water (90-120ml) — Start with less and add more as needed. The dough should just barely hold together.
For the Pumpkin Filling
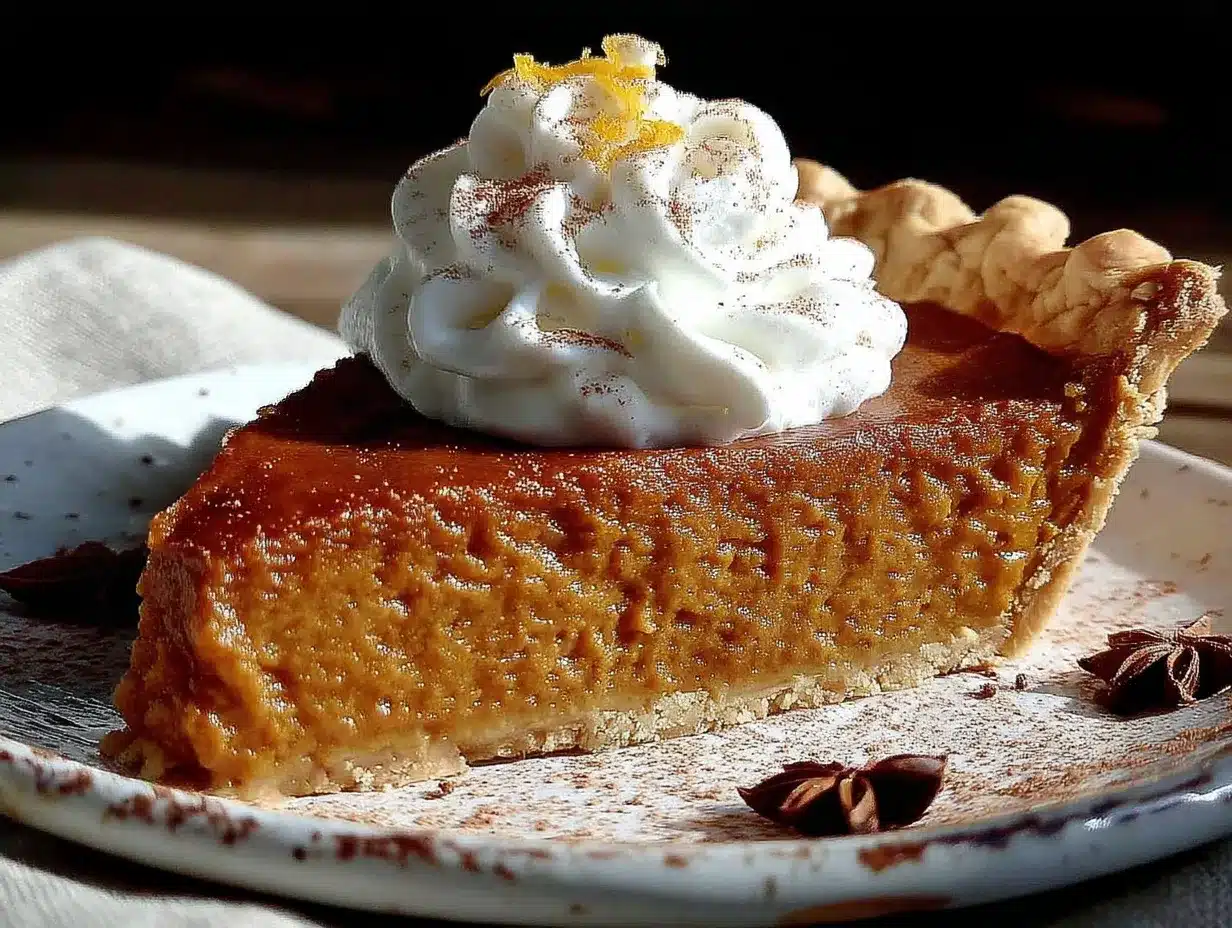
- 1 (15-ounce) can pumpkin puree (425g) — Not pumpkin pie filling! Make sure you grab plain pumpkin puree. Libby’s is my go-to brand for consistent thickness and flavor.
- 1 ½ cups granulated sugar (300g) — This gives the pie just the right sweetness without being cloying.
- 1 teaspoon ground cinnamon (2.5g) — The backbone of the spice blend. I prefer Vietnamese cinnamon for its warm, intense flavor.
- ½ teaspoon ground ginger (1g) — Adds a subtle warmth and depth.
- ½ teaspoon ground nutmeg (1g) — Freshly grated is amazing if you have it, but pre-ground works perfectly fine.
- ¼ teaspoon ground cloves (0.5g) — A little goes a long way. Too much clove can make the pie taste like a candle.
- ½ teaspoon salt (2.5g) — Balances the sweetness and enhances all the spices.
- 4 large eggs — Room temperature eggs blend more smoothly into the filling. If you forgot to take them out of the fridge, just place them in a bowl of warm water for 5 minutes.
- 1 (12-ounce) can evaporated milk (354ml) — Or substitute with 1 ½ cups of heavy cream mixed with ½ cup whole milk for an even richer texture. I’ve done both, and honestly, the cream version is heavenly.
- 1 teaspoon vanilla extract (5ml) — Pure vanilla extract makes a difference, but imitation works in a pinch.
Optional but Recommended
- Whipped cream for serving — Homemade is easy: just whip 1 cup heavy cream with 2 tablespoons powdered sugar and ½ teaspoon vanilla until soft peaks form. But honestly, the canned stuff works too—no judgment here.
- Additional cinnamon for dusting — A light sprinkle on top before serving looks beautiful and adds a little extra flavor.
Equipment Needed
You don’t need a fancy kitchen to make a great pumpkin pie. Here’s what you’ll actually use:
- 9-inch deep-dish pie plate (or two standard 9-inch pie plates) — A glass or ceramic pie plate works best for even heat distribution. I’ve used metal pans too, and they work fine—just keep an eye on the crust edges so they don’t burn.
- Large mixing bowls — You’ll need one for the crust and one for the filling. Nothing fancy needed.
- Rolling pin — If you don’t have one, a clean wine bottle works surprisingly well. I’ve done it more times than I care to admit.
- Pastry cutter or two forks — For cutting the butter into the flour. You can also use your fingertips, just work quickly so the butter doesn’t warm up.
- Whisk — For blending the filling ingredients until smooth.
- Measuring cups and spoons — Accuracy matters in baking, but don’t stress too much. A little extra cinnamon never hurt anyone.
- Plastic wrap — For chilling the dough.
- Pie weights or dried beans — For blind baking the crust. If you don’t have pie weights, dried beans or even uncooked rice work perfectly. I keep a bag of cheap dried beans in my pantry just for this purpose.
- Parchment paper or aluminum foil — To line the crust before adding the weights.
- Cooling rack — Essential for letting the pie cool evenly so the custard sets properly.
Preparation Method
Alright, let’s make this pie. I’ve broken it down into clear steps with all the little tricks I’ve learned from my own kitchen disasters.
Step 1: Make the Pie Crust (30 minutes active + 1 hour chilling)
In a large bowl, whisk together the flour, salt, and sugar. Add the cold, cubed butter and use a pastry cutter or two forks to cut it into the flour until the mixture looks like coarse crumbs with some pea-sized butter pieces remaining. Don’t overwork it—those little butter chunks are what create flaky layers.
Sprinkle the ice water over the mixture, one tablespoon at a time, tossing with a fork after each addition. Stop adding water when the dough just holds together when you squeeze a handful. It should look shaggy, not wet. Turn the dough out onto a lightly floured surface and bring it together into a disc. Wrap it in plastic wrap and refrigerate for at least 1 hour. I once skipped this step and ended up with a crust that shrunk down to nothing in the oven. Learn from my mistakes—chill the dough!
Step 2: Blind Bake the Crust (20 minutes prep + 20 minutes baking)
Preheat your oven to 375°F (190°C). On a lightly floured surface, roll the chilled dough out to a 12-inch circle, about ¼-inch thick. Carefully transfer it to your pie plate, gently pressing it into the bottom and up the sides. Trim the excess dough, leaving about a ½-inch overhang, then fold it under and crimp the edges however you like. I go for a simple fork press because I’m not trying to win any beauty contests.
Line the crust with parchment paper or foil and fill it with pie weights or dried beans. Bake for 15 minutes, then remove the weights and parchment and bake for another 5-7 minutes until the bottom looks dry and just slightly golden. Set it aside to cool while you make the filling. If you see any cracks forming, don’t panic—just brush them with a little beaten egg white before adding the filling and they’ll seal right up.
Step 3: Make the Filling (10 minutes)
Reduce the oven temperature to 350°F (175°C). In a large bowl, whisk together the sugar, cinnamon, ginger, nutmeg, cloves, and salt. In a separate bowl, lightly beat the eggs, then whisk in the pumpkin puree, evaporated milk, and vanilla extract until smooth.
Gradually add the wet ingredients to the dry ingredients, whisking constantly to prevent lumps. Keep whisking until the mixture is completely smooth and uniform. The filling should be a beautiful deep orange color with a slight sheen. Give it a taste—yes, raw eggs and all. It sounds weird, but it’s the best way to check if the seasoning is right. Just a tiny dab on your finger is enough.
Step 4: Assemble and Bake (50-60 minutes)
Place the blind-baked crust on a baking sheet (this catches any spills and makes it easier to get in and out of the oven). Pour the filling into the crust, filling it almost to the top. The filling will puff up slightly as it bakes, so leave about ¼ inch of space at the top.
Carefully transfer the baking sheet to the oven and bake for 50-60 minutes. The pie is done when the edges are set and slightly puffed, but the center still jiggles just a little when you gently shake the pan. It will continue to cook and set as it cools. If the crust edges start browning too quickly, loosely cover them with foil or a pie shield ring about 30 minutes into baking.
Step 5: Cool and Serve (at least 2 hours cooling)
Let the pie cool on a wire rack for at least 2 hours. This is crucial—the custard needs time to set properly. If you cut into it while it’s still warm, you’ll end up with a runny mess. I know it’s tempting, but patience pays off here. Once completely cool, you can serve it at room temperature or refrigerate it for later.
When you’re ready to serve, slice with a sharp knife, wiping the blade clean between cuts for neat slices. Top with a generous dollop of whipped cream and a light dusting of cinnamon. Watch it disappear.
Cooking Tips & Techniques
After more pumpkin pies than I can count, here are the things I wish someone had told me when I started:
Keep everything cold for the crust. I cannot stress this enough. Cold butter, ice water, and even chilling your bowl and flour in the fridge for 10 minutes before starting makes a huge difference. Warm butter melts into the flour instead of creating those flaky pockets, and you end up with a tough, dense crust. If your kitchen is warm, pop the dough back in the fridge for 10 minutes if it starts feeling sticky.
Don’t overmix the filling. Whisk until just combined—overbeating incorporates too much air, which can cause the filling to puff up and crack as it bakes. A few tiny bubbles on the surface are fine, but you don’t want a frothy mixture. I learned this the hard way when my pie looked like the surface of the moon.
Use a water bath if you’re nervous about cracking. Place the pie plate inside a larger baking dish and pour hot water into the outer dish until it comes about halfway up the sides of the pie plate. This gentle, even heat helps prevent the custard from cracking. I don’t always do this, but it’s a great trick for beginners or when you’re making a pie for a special occasion where presentation matters.
Let it cool gradually. Don’t move the pie from the oven directly into the fridge. Let it cool on the counter for at least 2 hours first. Sudden temperature changes can cause the custard to separate or crack. I once rushed this step because I needed the counter space, and the pie ended up with a sad, weeping texture.
Make it ahead for better flavor. Pumpkin pie actually tastes better the next day. The spices have time to meld and mellow, and the texture becomes even creamier. I often make this pie two days before a gathering, and it’s always a hit. Just keep it covered in the fridge.
Variations & Adaptations
One of the best things about this recipe is how flexible it is. Here are some ways I’ve adapted it over the years:
Dairy-Free Version: Swap the butter in the crust with coconut oil or a plant-based butter stick (I like Earth Balance). For the filling, use full-fat coconut milk instead of evaporated milk. The coconut flavor is subtle and actually complements the pumpkin nicely. I made this for a friend with a dairy allergy last Thanksgiving, and she said it was the best pumpkin pie she’d had in years.
Gluten-Free Option: Use a gluten-free all-purpose flour blend in the crust. I’ve had good results with Bob’s Red Mill 1-to-1 Baking Flour. Just add an extra tablespoon of ice water since gluten-free flours tend to be more absorbent. You can also skip the homemade crust entirely and use a store-bought gluten-free crust—no shame in that game.
Spice It Up: Feel free to adjust the spice blend to your taste. My sister-in-law loves a spicy pie, so I add an extra ½ teaspoon of cinnamon and a pinch of cayenne pepper for her. For a more traditional flavor, you can substitute the individual spices with 2 teaspoons of pumpkin pie spice. I prefer making my own blend because I like controlling the proportions, but the pre-mixed stuff works just fine.
Mini Pies for Portion Control: Use a muffin tin to make individual mini pies. Roll out the crust, cut circles with a biscuit cutter, press them into the muffin cups, fill with the pumpkin mixture, and bake for about 20-25 minutes. These are perfect for parties or for families who want to avoid leftover pie sitting on the counter calling their name.
Maple Pumpkin Pie: Replace ½ cup of the granulated sugar with pure maple syrup for a deeper, more complex sweetness. Reduce the evaporated milk by ¼ cup to compensate for the extra liquid. The maple flavor pairs beautifully with the pumpkin and spices—it’s become my go-to fall variation.
Serving & Storage Suggestions
This pie is best served at room temperature or slightly chilled. If you’ve refrigerated it, let it sit on the counter for about 30 minutes before serving to take the chill off. The flavors really open up when the pie isn’t straight-from-the-fridge cold.
For presentation, a generous swirl of whipped cream and a light dusting of cinnamon or nutmeg makes it look bakery-worthy. You can also add a few candied pecans or a drizzle of caramel sauce for an extra special touch. If I’m serving this for a holiday dinner, I’ll arrange the slices on a platter with fresh rosemary sprigs and cranberries around the edges—it looks gorgeous with almost no extra effort.
This pie pairs beautifully with a cup of hot coffee, spiced apple cider, or even a glass of cold milk. For a full dessert spread, serve it alongside a classic apple pie or a plate of soft pumpkin cookies for variety.
Storage Instructions: Cover the pie loosely with plastic wrap or foil and store it in the refrigerator for up to 4 days. The crust may soften slightly over time, but the flavor will actually improve. I do not recommend leaving pumpkin pie at room temperature for more than 2 hours due to the eggs and dairy in the filling—better safe than sorry.
Freezing Instructions: You can freeze the fully baked and cooled pie for up to 2 months. Wrap it tightly in plastic wrap, then a layer of foil, and place it in a freezer bag. To thaw, transfer it to the refrigerator overnight. The texture will be slightly softer after freezing, but it’s still delicious. I’ve also frozen the unbaked filling separately in a freezer-safe bag for up to 3 months—just thaw it in the fridge and pour it into a fresh crust when you’re ready to bake.
Reheating Tips: If you prefer warm pie, place individual slices on a baking sheet and warm them in a 300°F (150°C) oven for about 10 minutes. The microwave works in a pinch, but it can make the crust soggy. Honestly, I think this pie is best at room temperature, but to each their own.
Nutritional Information & Benefits
Here’s the approximate nutritional breakdown for one slice of pie (based on 12 servings):
- Calories: 340
- Total Fat: 18g
- Saturated Fat: 11g
- Cholesterol: 95mg
- Sodium: 310mg
- Total Carbohydrates: 42g
- Dietary Fiber: 2g
- Sugars: 24g
- Protein: 6g
While pumpkin pie isn’t exactly health food, it does have some redeeming qualities. Pumpkin is packed with vitamin A (over 200% of your daily needs in one serving), which is great for eye health and immune function. It’s also a good source of fiber and potassium. The eggs provide high-quality protein and choline, which supports brain health. And the cinnamon in the spice blend has anti-inflammatory properties—so there’s that.
If you’re watching your sugar intake, you can reduce the sugar to 1 cup without significantly affecting the texture. I’ve done this before and the pie was still plenty sweet, especially with a dollop of lightly sweetened whipped cream. For a lower-fat option, use 2% milk instead of evaporated milk, though the texture will be slightly less rich.
This recipe contains gluten, dairy, and eggs, so it’s not suitable for those with allergies to those ingredients. See the variations section above for dairy-free and gluten-free adaptations.
Conclusion
Look, I’m not going to tell you this is the fanciest pumpkin pie you’ll ever make. It’s not decorated with intricate lattice work or topped with gold leaf. But it is the pie that people ask for year after year, the one that disappears first at potlucks, the one that makes your kitchen smell like everything good about fall. It’s honest, it’s reliable, and it feeds a crowd without emptying your wallet.
What I love most about this recipe is how forgiving it is. You can mess up the timing, forget an ingredient, or have the crust crack on you, and it still turns out delicious. It’s the kind of recipe that builds confidence in the kitchen, whether you’re a seasoned baker or someone who’s never made a pie from scratch before. And honestly? That’s the best kind of recipe to have in your back pocket.
I’d love to hear how your pie turns out. Did you make any substitutions? Did your family love it? Did you discover a new favorite variation? Drop a comment below and let me know—I read every single one, and I love hearing about your kitchen victories. And if you’re looking for more crowd-pleasing desserts, check out our easy peach cobbler recipe or these no-bake chocolate chip cookies for when you’re short on time.
Now go make that pie. Your family is going to love it.
Frequently Asked Questions
Can I use fresh pumpkin instead of canned?
Absolutely! You’ll need about 2 cups of pumpkin puree from a small sugar pumpkin (about 2 pounds). Roast the pumpkin at 400°F for 45 minutes until tender, then scoop out the flesh and puree it in a food processor. The main difference is that fresh pumpkin has more water content, so you’ll want to strain it through cheesecloth or a clean kitchen towel for about 30 minutes to remove excess liquid before using it in the recipe.
Why did my pumpkin pie crack on top?
This usually happens from overbaking or sudden temperature changes. The filling expands as it bakes and contracts as it cools, and if it cools too quickly, it cracks. To prevent this, pull the pie out of the oven when the center is still slightly jiggly (it will continue to set as it cools), and let it cool gradually on the counter rather than moving it to a cold surface or the fridge right away.
Can I make this pie without a pie crust?
Yes! You can make a crustless pumpkin pie by greasing your pie plate well and pouring the filling directly in. Bake at 350°F for about 35-40 minutes, or until set. It’s essentially a pumpkin custard, and it’s delicious on its own or served with whipped cream. Just note that it won’t hold together as firmly for slicing, so it’s best served in bowls or ramekins.
How do I know when the pie is done baking?
The best test is the jiggle test. Gently shake the pie plate—the edges should be set and firm, but the center should have a slight wobble, like Jell-O that’s just set. If the entire pie is liquid and sloshing, it needs more time. If the center is completely firm and doesn’t jiggle at all, it’s likely overbaked. A knife inserted near the center should come out clean or with just a few moist crumbs attached.
Can I use a store-bought crust to save time?
Absolutely, and no judgment here! A store-bought refrigerated pie crust works perfectly fine. Just blind bake it according to the package directions before adding the filling. I’ve done this many times when I was short on time or just didn’t feel like making dough from scratch. The filling is the star of this recipe anyway, and it tastes just as amazing in a store-bought crust.
Pin This Recipe!
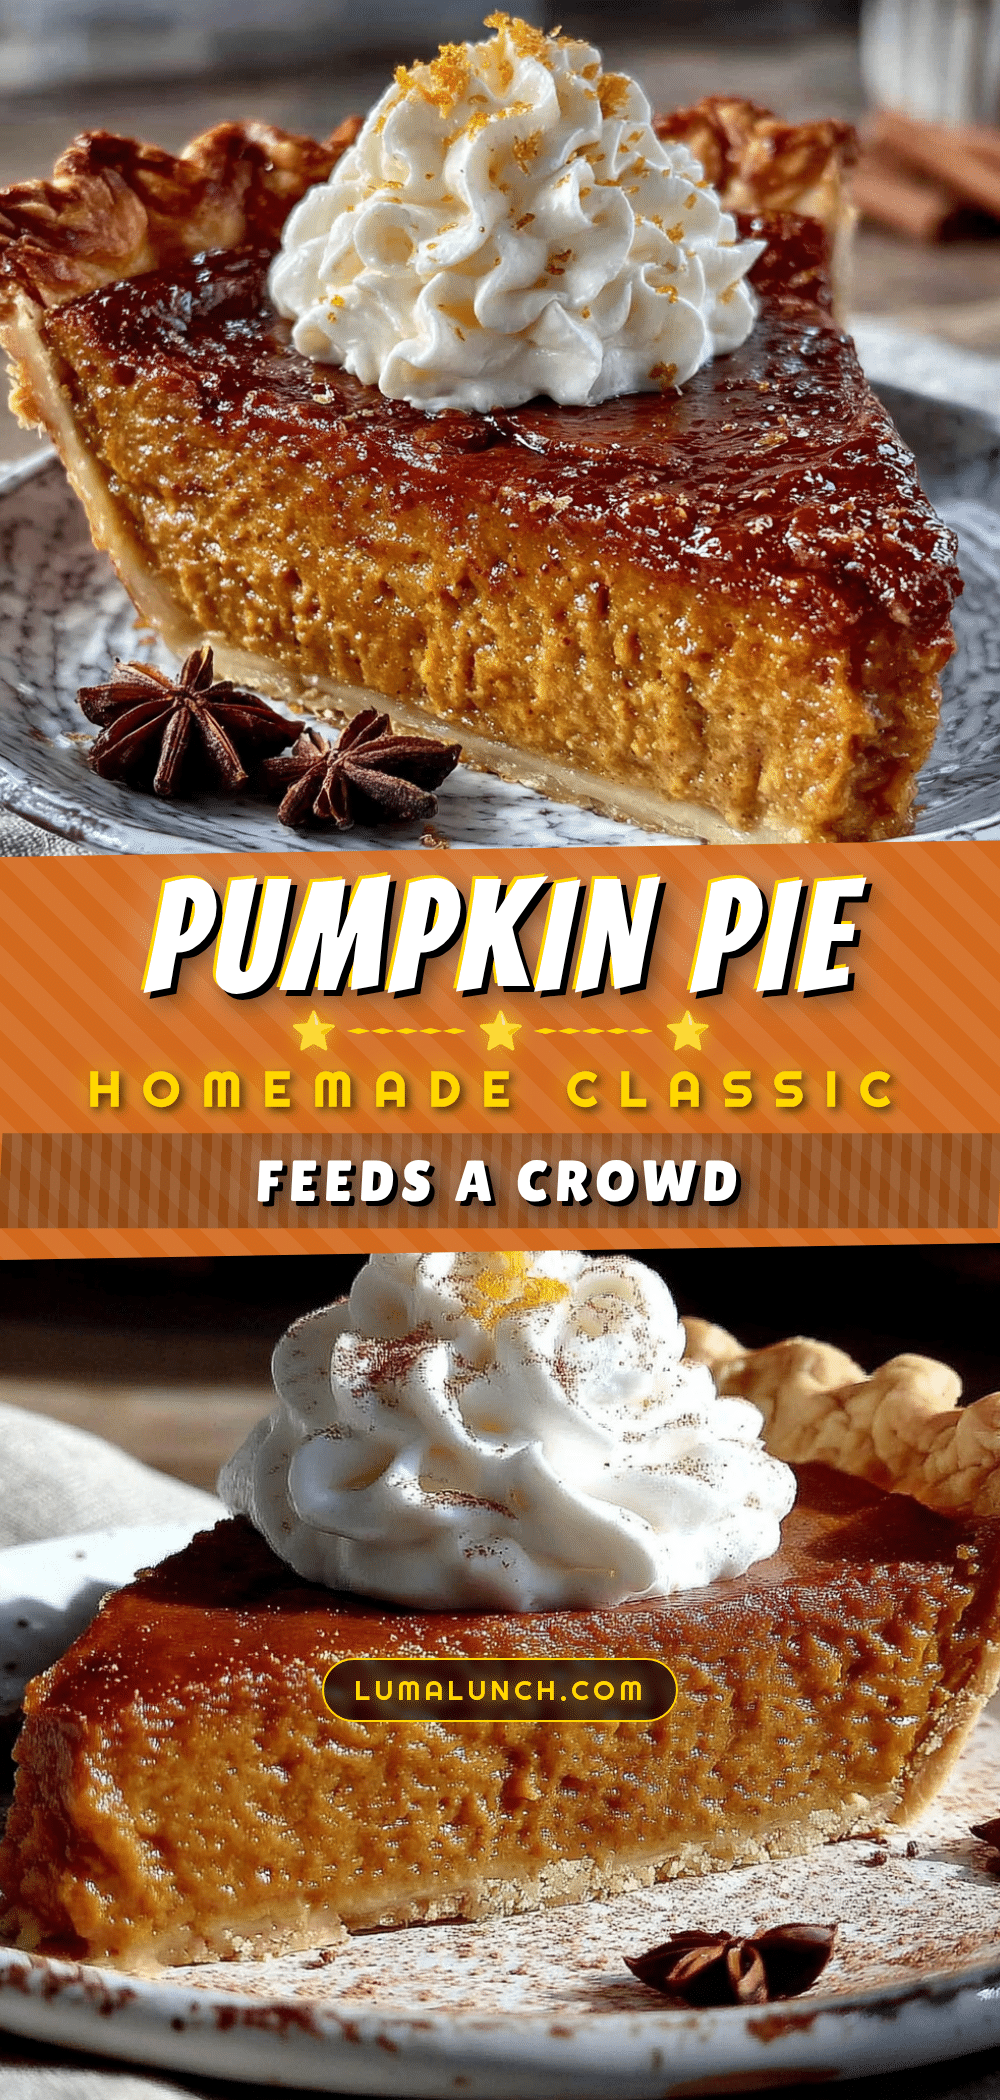
Best Homemade Pumpkin Pie Recipe for a Crowd

A simple, honest pumpkin pie that feeds a crowd without breaking the bank. Made with pantry-friendly ingredients and a foolproof method, this pie features a silky smooth custard with a perfect spice blend.
- Prep Time: 30 minutes
- Cook Time: 60 minutes
- Total Time: 2 hours 30 minutes (plus 1 hour chilling)
- Yield: 12 servings 1x
- Category: Dessert
- Cuisine: American
Ingredients
- 2 ½ cups all-purpose flour (315g)
- 1 teaspoon salt (5g)
- 1 tablespoon granulated sugar (12g)
- 1 cup cold unsalted butter (226g, 2 sticks), cut into small cubes
- 6–8 tablespoons ice water (90-120ml)
- 1 (15-ounce) can pumpkin puree (425g)
- 1 ½ cups granulated sugar (300g)
- 1 teaspoon ground cinnamon (2.5g)
- ½ teaspoon ground ginger (1g)
- ½ teaspoon ground nutmeg (1g)
- ¼ teaspoon ground cloves (0.5g)
- ½ teaspoon salt (2.5g)
- 4 large eggs, room temperature
- 1 (12-ounce) can evaporated milk (354ml) or 1 ½ cups heavy cream mixed with ½ cup whole milk
- 1 teaspoon vanilla extract (5ml)
- Whipped cream for serving (optional)
- Additional cinnamon for dusting (optional)
Instructions
- Make the pie crust: In a large bowl, whisk together flour, salt, and sugar. Add cold cubed butter and cut in with a pastry cutter or two forks until mixture resembles coarse crumbs with some pea-sized butter pieces. Sprinkle ice water over mixture, one tablespoon at a time, tossing with a fork until dough just holds together. Form into a disc, wrap in plastic wrap, and refrigerate for at least 1 hour.
- Blind bake the crust: Preheat oven to 375°F (190°C). Roll chilled dough to a 12-inch circle, about ¼-inch thick. Transfer to a 9-inch deep-dish pie plate, trim and crimp edges. Line with parchment paper and fill with pie weights or dried beans. Bake for 15 minutes, remove weights and parchment, and bake another 5-7 minutes until bottom is dry and slightly golden. Set aside to cool.
- Make the filling: Reduce oven temperature to 350°F (175°C). In a large bowl, whisk together sugar, cinnamon, ginger, nutmeg, cloves, and salt. In a separate bowl, lightly beat eggs, then whisk in pumpkin puree, evaporated milk, and vanilla until smooth. Gradually add wet ingredients to dry ingredients, whisking constantly until smooth.
- Assemble and bake: Place blind-baked crust on a baking sheet. Pour filling into crust, leaving about ¼ inch of space at the top. Bake for 50-60 minutes, until edges are set and center jiggles slightly when shaken. If crust edges brown too quickly, cover loosely with foil after 30 minutes.
- Cool and serve: Let pie cool on a wire rack for at least 2 hours. Serve at room temperature or slightly chilled with whipped cream and a dusting of cinnamon.
Notes
Keep everything cold for the crust. Don’t overmix the filling. Use a water bath if nervous about cracking. Let pie cool gradually. Make ahead for better flavor.
Nutrition
- Serving Size: 1 slice
- Calories: 340
- Sugar: 24
- Sodium: 310
- Fat: 18
- Saturated Fat: 11
- Carbohydrates: 42
- Fiber: 2
- Protein: 6
Keywords: pumpkin pie, homemade pumpkin pie, easy pumpkin pie, crowd-pleasing pumpkin pie, budget-friendly pumpkin pie, Thanksgiving dessert, fall dessert